Battle Report: Purging the Foe

What happens when a mission requires the total annihilation of your enemy? Well, both armies start shrinking in short order.
The next round in my continually mutating Warhammer journey would be fought at Steve's house, and in our established fashion use a terrain layout and primary mission generated the night before. A great way to reduce the amount of setup time, allowing your opponent (moi) to simply show up, unpack and be ready to deploy.
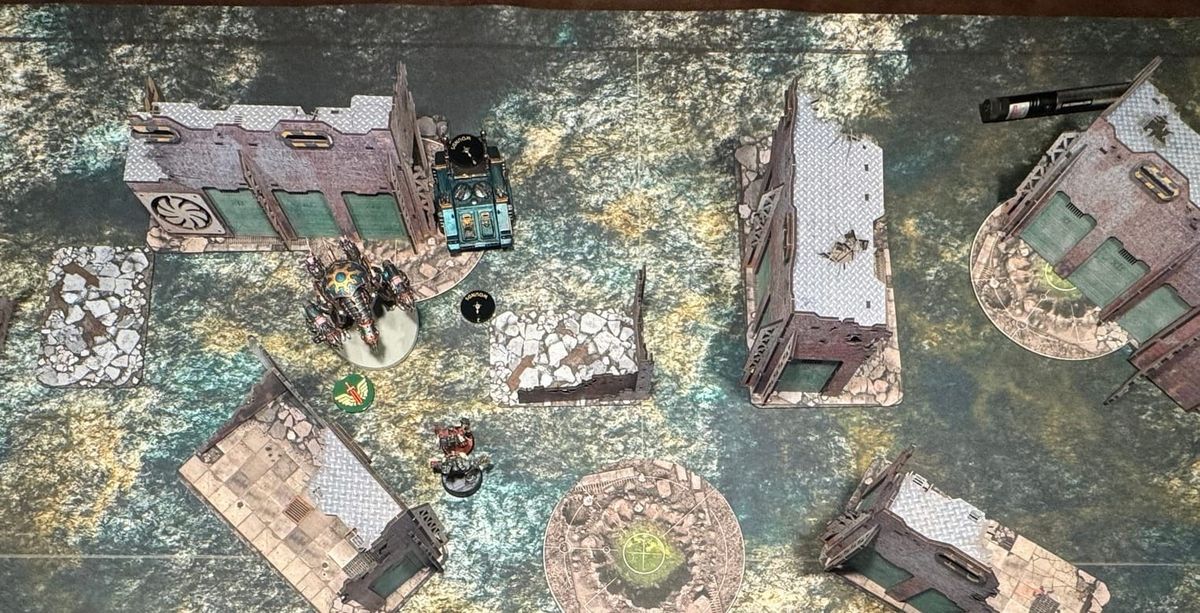
Through a series of arcane processes and non-Euclidian rituals, Steve established that we would be playing on GW Layout 6, using the Crucible of Battle deployment zones, and the primary mission would be Purge the Foe.
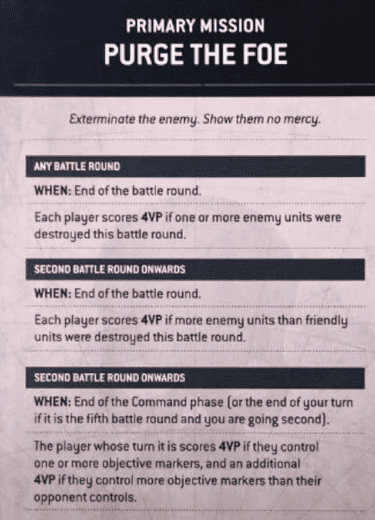
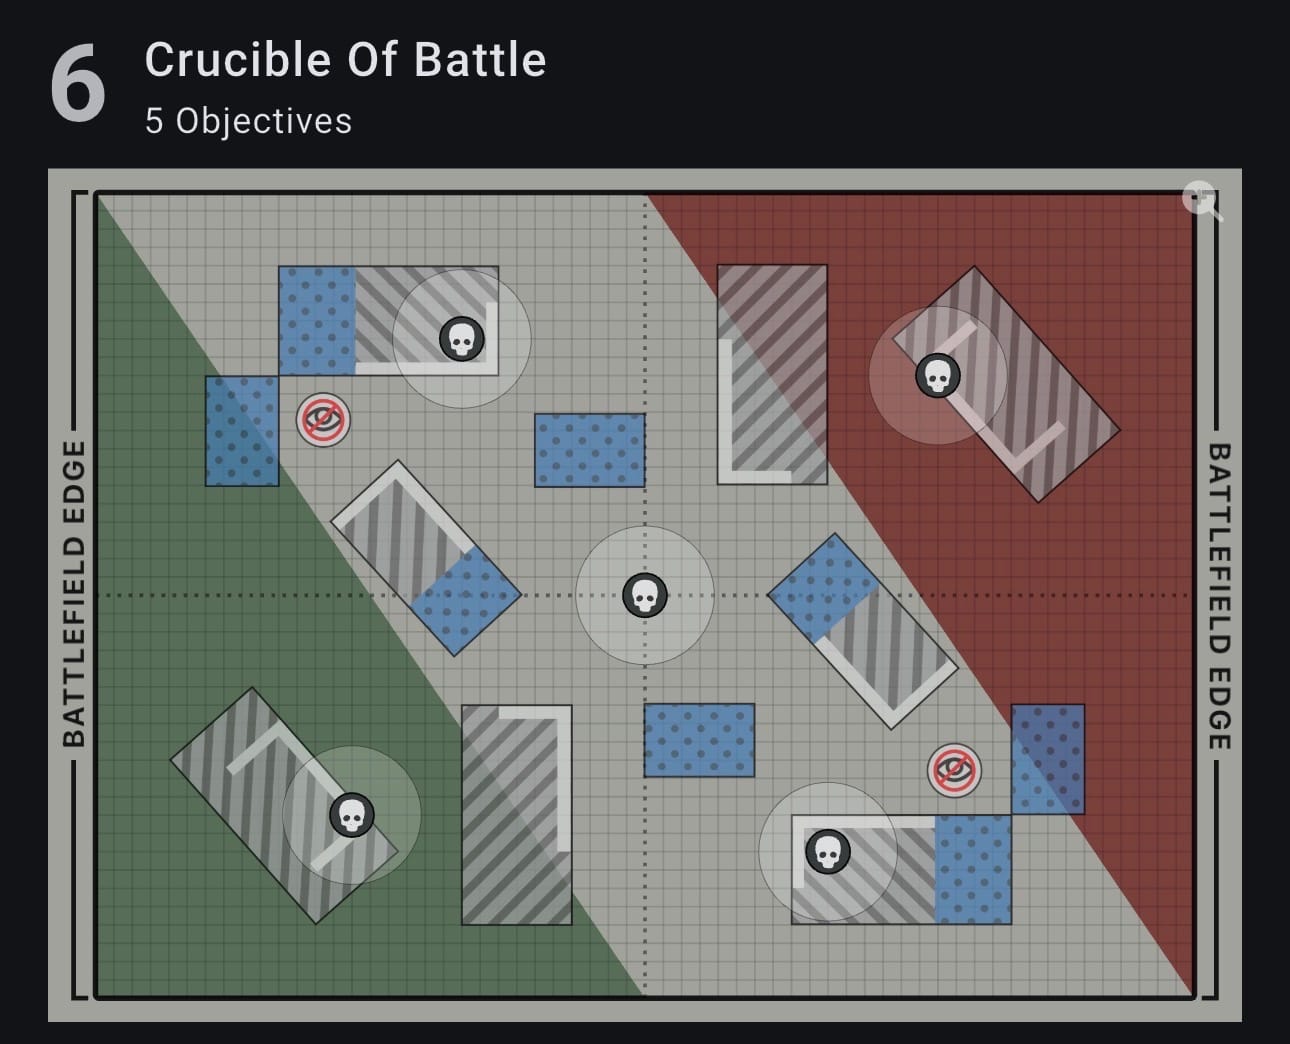
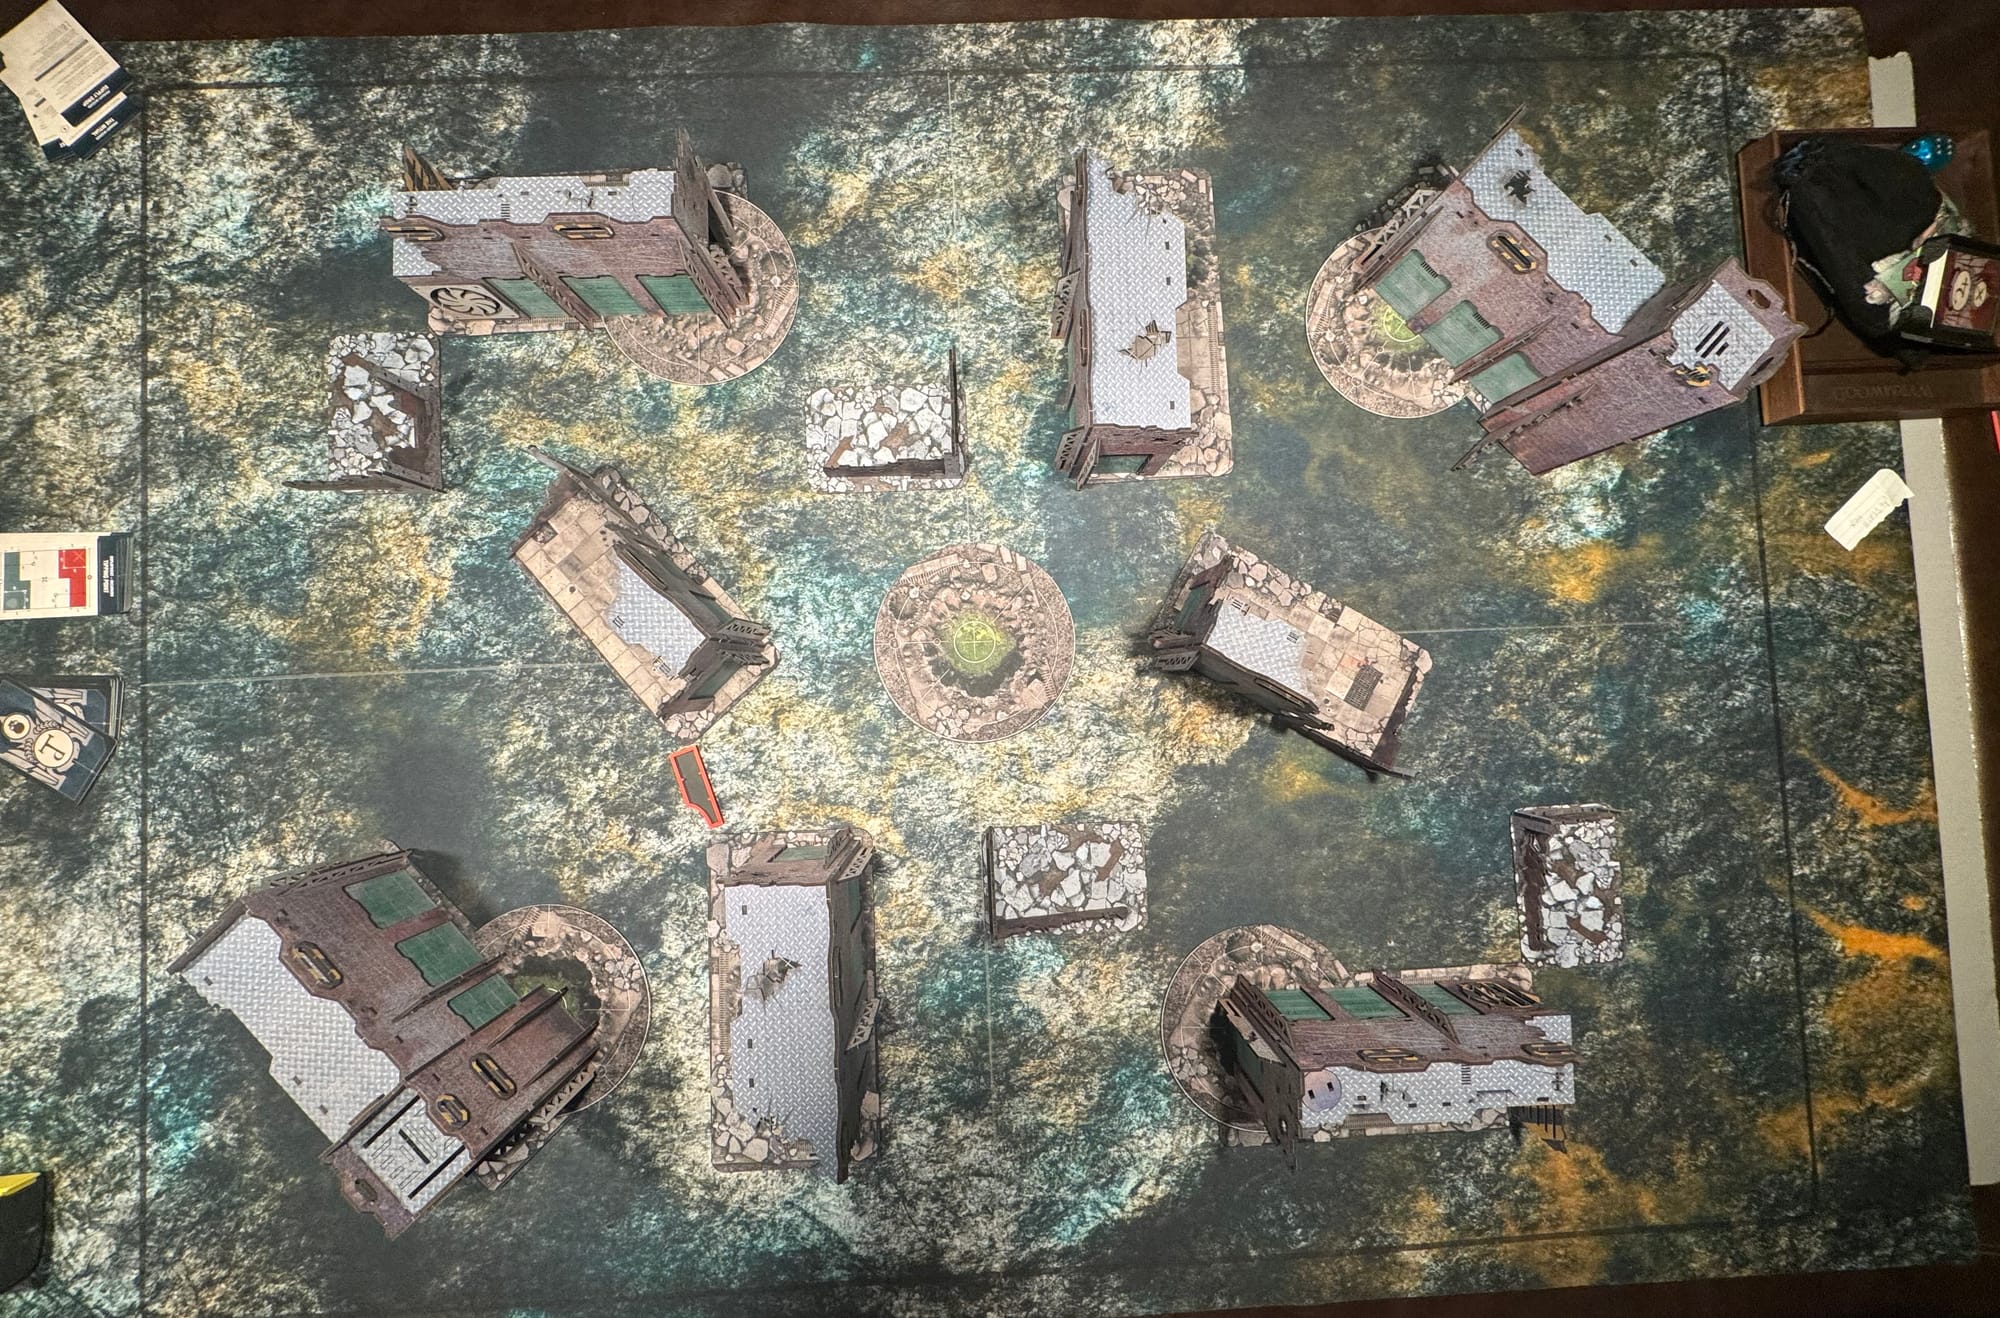
Everybody wants to Purge the Foe, obviously, but how exactly do you go about doing it?
This mission is a little tricky because it scores points both during your command phase, and at the end of the battle round (after each player has taken a single turn). Did we score all the correct points? The world may never know.
What the Blood Angels Brought to the Battlefield
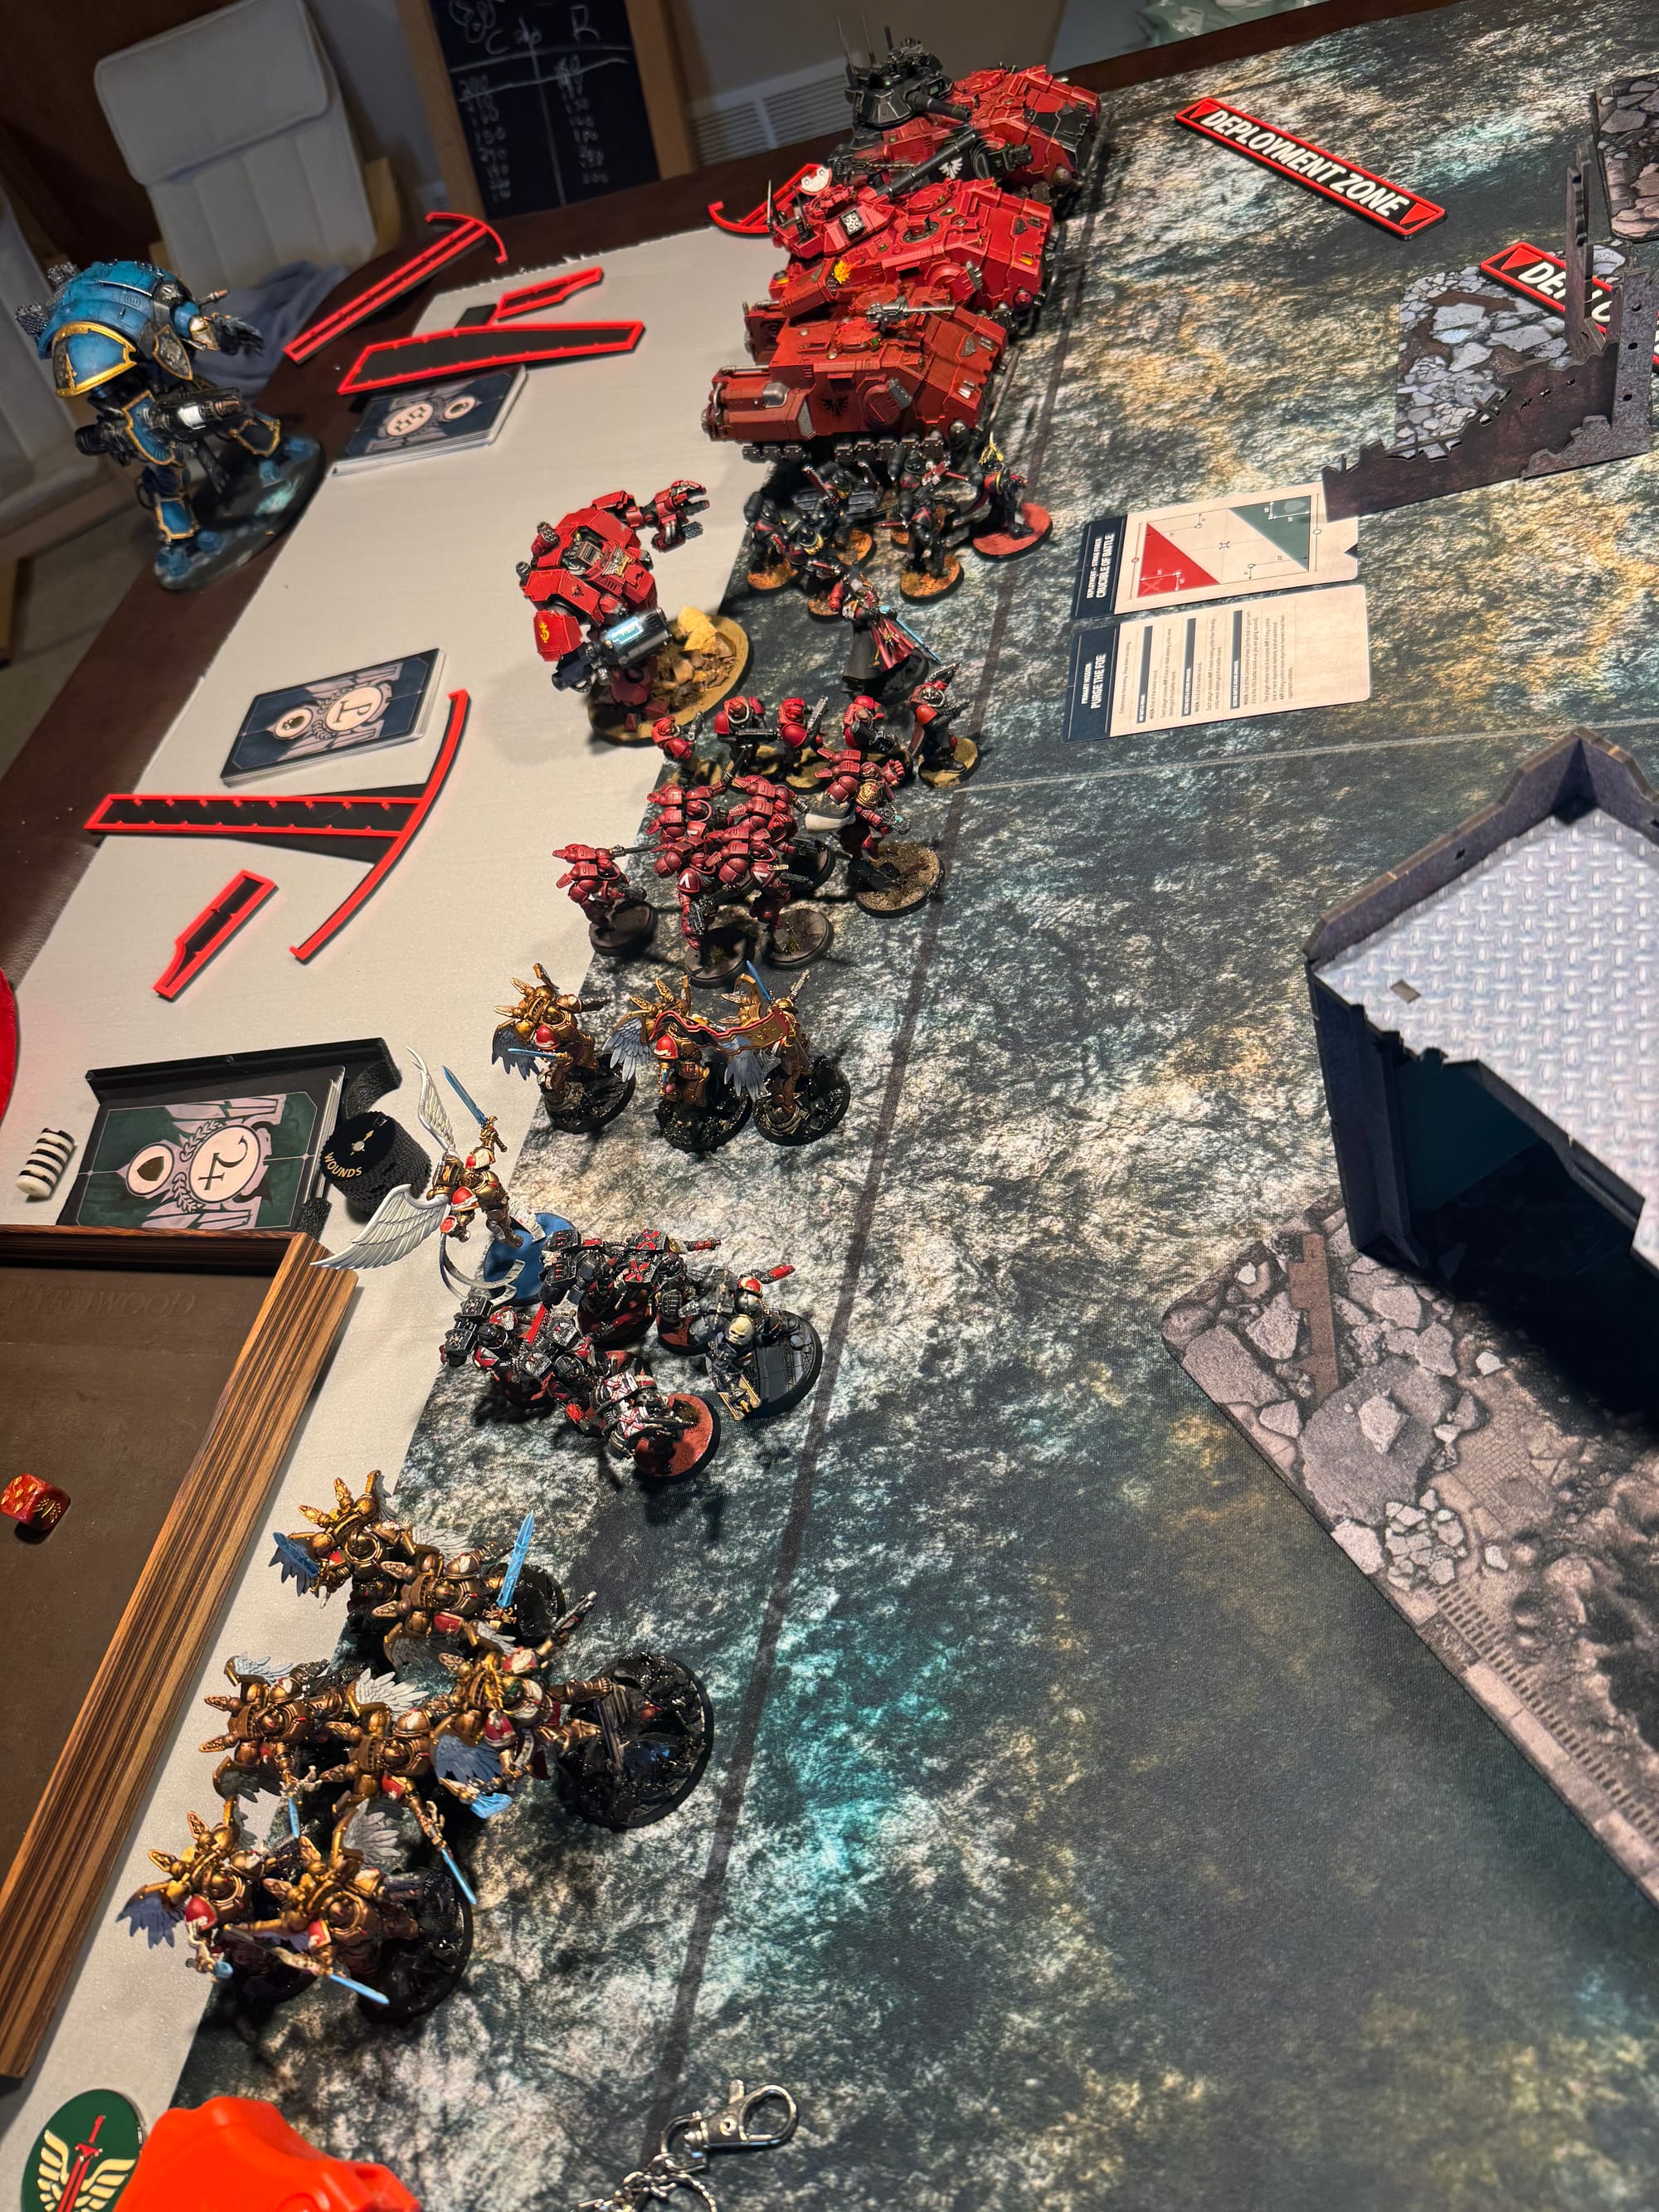
Chief Librarian Mephiston
The Sanguinor
Impulsor
Captain with Jump Pack with
(5X) Assault Intercessors with Jump Packs
Death Company Captain with
(5X) Death Company Marines
Lemartes with
(5X) Death Company Marines with Jump Packs
Gladiator Lancer
Ironhail heavy stubber
Lancer laser destroyer
Gladiator Lancer
Ironhail heavy stubber
Lancer laser destroyer
Redemptor Dreadnought
Macro plasma incinerator
Redemptor fist
Commander Dante with
(6X) Sanguinary Guard
(3X) Sanguinary Guard
(5x) Scout Squad with Missile launcher
Isaac's Army:
Cypher
Chaos Lord with Jump Pack (Cloak of Obfuscation)
10x Cultist Mob
10x Cultist Mob
Chaos Lord with
5x Legionaries
Chaos Sorcerer with
5x Chaos Terminator Squad (in Reserve)
Chaos Sorcerer with
5x Chaos Terminator Squad in Land Raider
Chaos Vindicator
Forgefiend
6x Noise Marines in Chaos Rhino
6x Noise Marines in Chaos Rhino
Starting Deployment
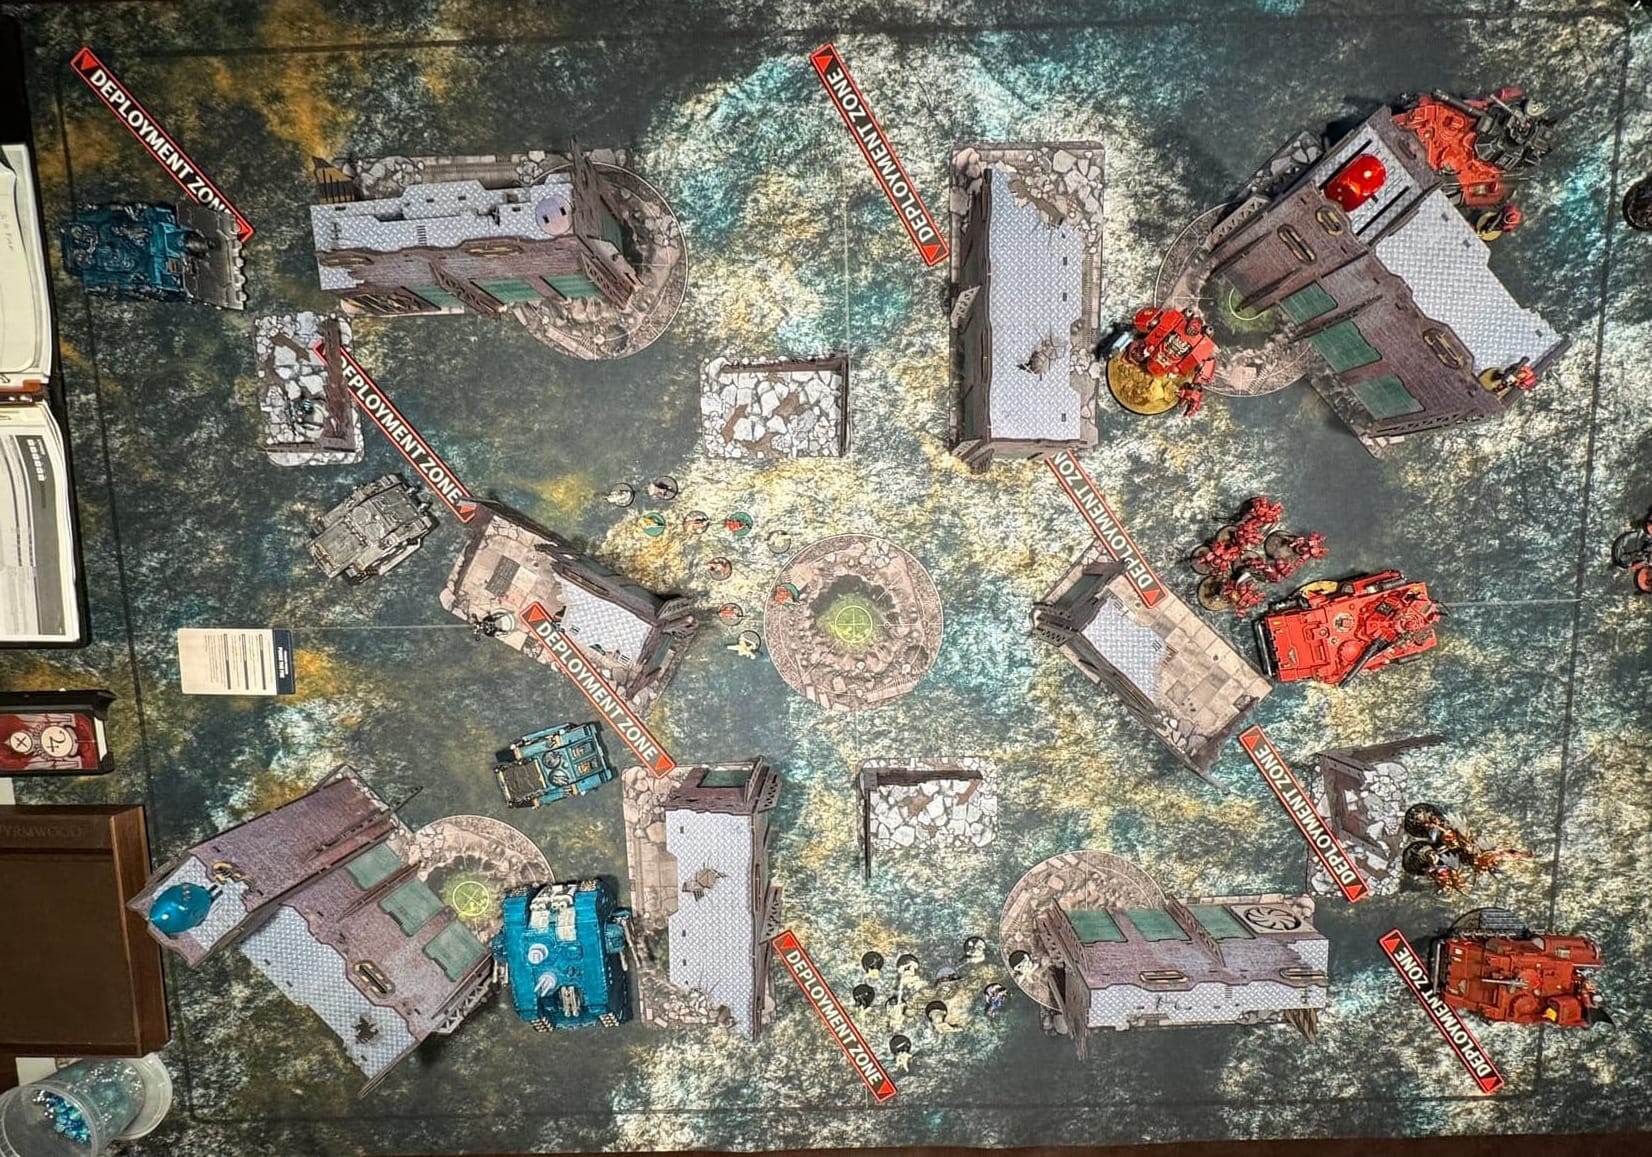
One of the things maybe not immediately apparent on the top-down view of deployment is this: my "home" objective was VERY weakly held. I have my Land Raider parked on top of it and that is it. And I don't plan on having my Land Raider stay there for long.
The mission Purge Your Foe gives you points first for killing dudes (even more points for killing MORE THAN your opponent), second for holding objectives (even more points for holding MORE THAN your opponent). No special distinction is made for your home objective.
What my army (The Deceptors) has over other armies is this: Infiltrators. So in this game I decided it was time to infiltrate, and just keep infiltrating. My home objective isn't infiltrating. That's just "trating".
Ain't nobody going to win a game like that.
My two squads of Chaos Cultists got into the no man's land business, starting the game with one foot on both the center objective (traditionally the hottest-most contested objective of them all) and the bottom objective (Steve's "natural expansion" objective.) My natural expansion objective at the top of the board sat totally empty in an act of pure contrarian defiance.
My starting game plan was to push forward with the Vindicator (on the top) and the Land Raider (on the bottom). The Vindicator would hold the top objective and rain down fire on anything trying to capture the middle. The Land Raider would destroy whatever came out to try to capture Steve's natural objective.
My cultists would run as fast as their little legs could take them back towards home base, acting as bullet magnets while the rest of my army advanced.
My Chaos Lord and his legionary retinue would sit near the center objective, ready to make all the difference if a contested objective situation formed.
We rolled the dice and Steve got the first turn!
Steve's First Turn
For secondary objectives, Steve drew Marked for Death and Tempting Target. These are both regarded as Trash Missions on the first turn. Both our armies are still at full power, and haven't really fully deployed yet to even make our armies reachable by opposition forces.
In this case, I made my Temping Target my home objective, which the Land Raider was still idling on. Steve couldn't deep strike until turn two, so the objective was completely unreachable.
For Marked for Death, I nominated my Land Raider, my Vindicator, and my Chaos Lord with Legionnaires (who were hiding inside a building).
Again, basically unreachable. If Steve had drawn Marked for Death towards the end of the game, when our entire armies were fully engaged in total annihilation, it would have been a completely different story.
Steve was, however, able to assign the Marked for Death "gamma" target to my bottom squad of Cultists. He already had his knuckles all lined up after I infiltrated directly on top of his natural objective, and eliminating the gamma target was simply Cheeto dust sprinkled on his Korean corn dog (as they say).
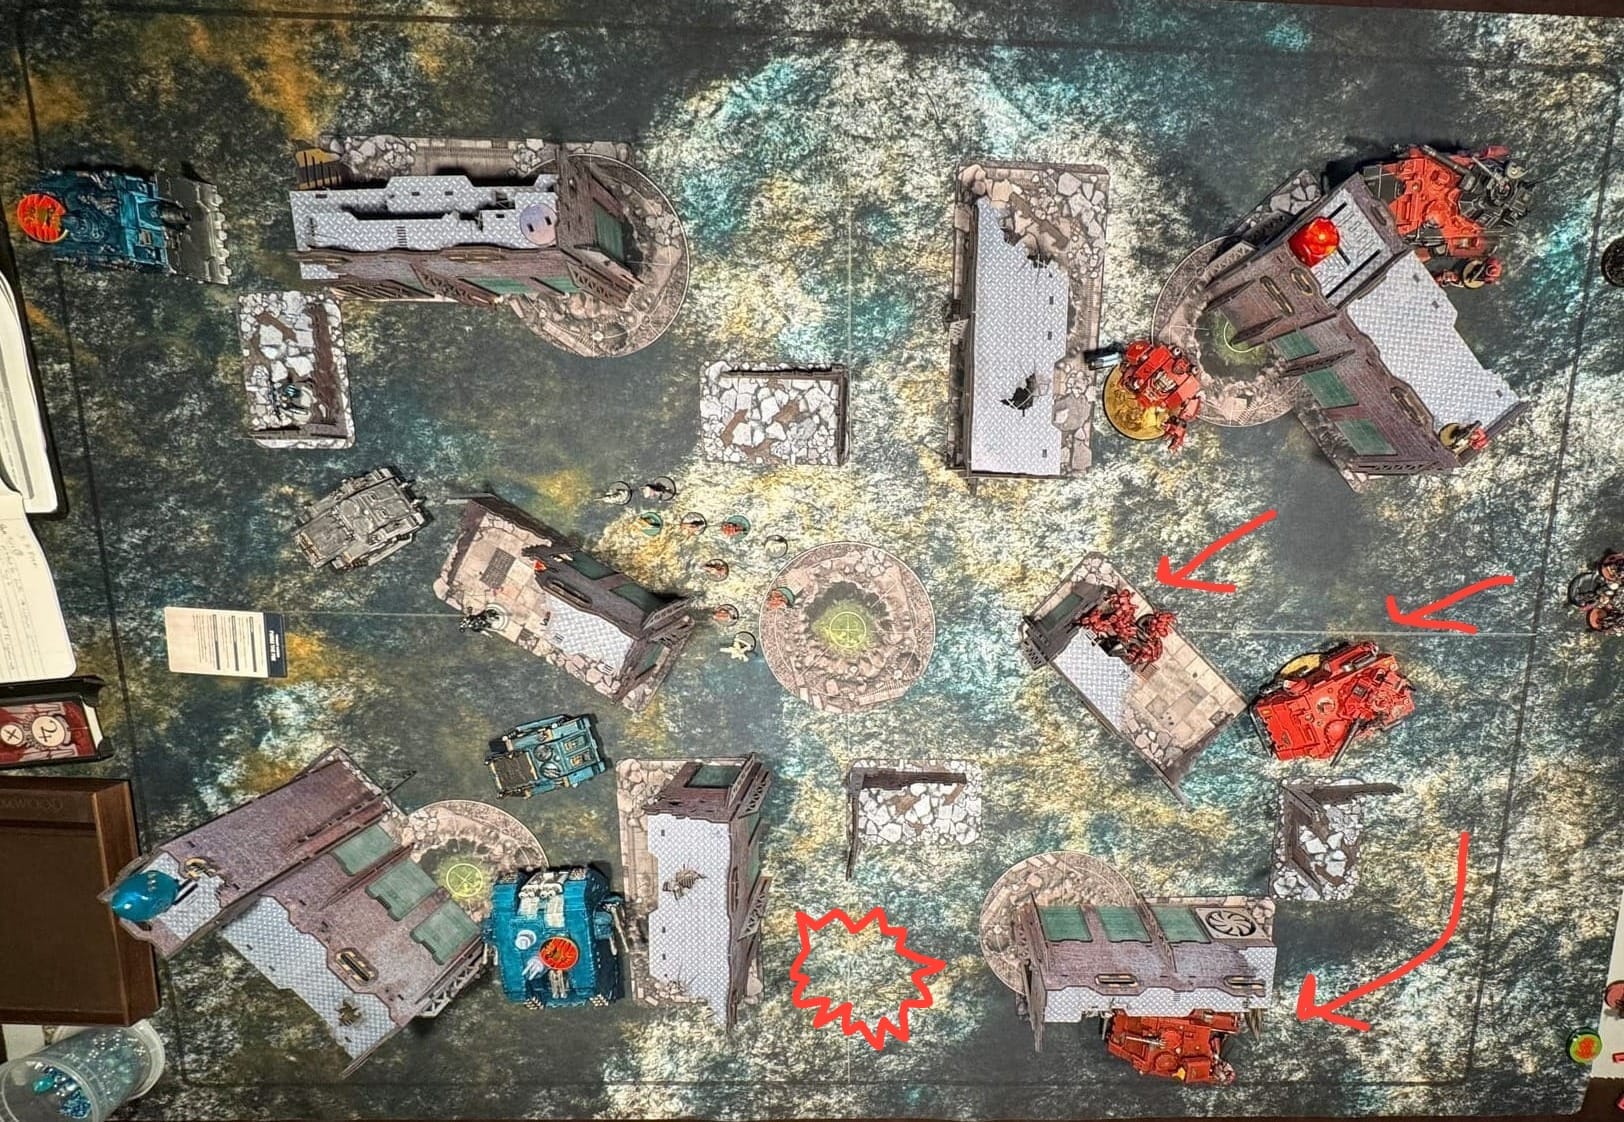
Steve moved most of his army into staging positions, with the plan to decisively win the extra Purge the Foe points awarded at the end of turn 2. The Captain with Jump Pack Intercessors sat in a building directly opposite my own Chaos Lord. The 3X Sanguinary Guard plus the Impulsor (Loaded with Death Company, Death Company Captain, plus Mephiston) moved in to decisively control his natural expansion objective.
Left hanging out in the open to Steve's entire army, my bottom squad of Cultists were easily and merrily wiped out.
Points:
Purge the Foe 4
Marked for Death 2
Isaac's Turn One
My plan went into action.
My remaining Cultists started the turn using their For the Dark Gods ability to "sticky" the center objective before running hooting and hollering past the building my Chaos Lord had taken up residence in, salvoes of gunfire following their every step. Thanks to this ability, I would remain in control of the center objective (even without anyone stationed on top of it) until Steve brought in his own forces to take control.
The Vindicator at the top of the board moved creakily towards my natural objective. Unfortunately, I had misjudged how long the Vindicator would take to get to said objective and I was forced to use my Chaos Lord with Jump Pack to take control when my tank failed to actually Get There.
In retrospect, the Vindicator is a Siege Engine. It has never had a reputation for fast-moving blitzes into enemy territory. I should have known this.
I got pretty lucky on my Secondary objectives, drawing Secure No Man's Land. Since my entire game plan revolved around stomping around No Man's Land. I scored points for doing what I wanted to do anyway.
I also drew Sabotage and my Chaos Lord with Jump Pack went to work sabotaging the building he was in (but wouldn't score points until the end of Steve's next turn).
Points
Purge the Foe 4
Secure No Man's Land 5
Steve's Turn Two
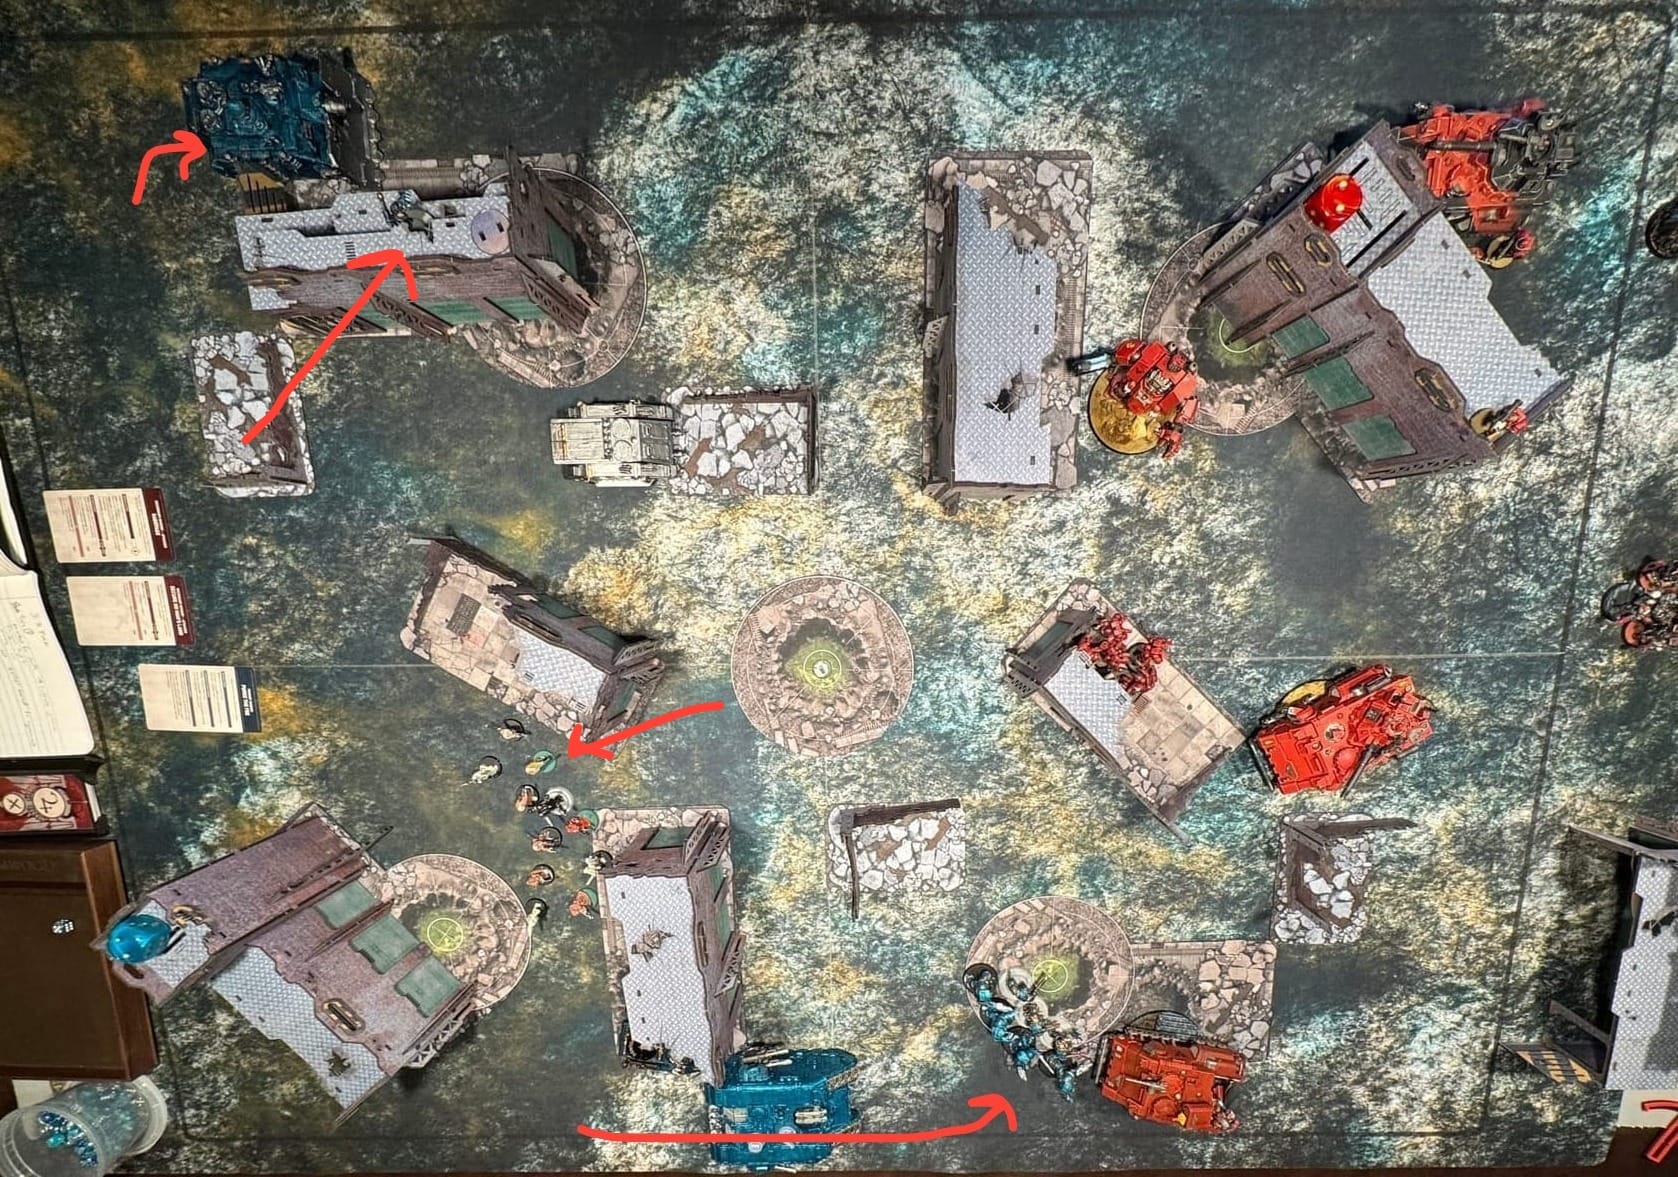
The Blood Angels army continued to advance towards the center of the board. And on the deep-striking side of things the squad of Death Company with Jump Packs (and Lemartes), landed just off my home objective (my remaining cultists were a little too close).
Now was the time when I could either respond how I've always responded, by reactively retreating my units to my besieged home objective, or respond in some new, as yet undiscovered, way.
Here's one new thing I did: At the end of the movement phase, I Rapid Ingressed my terminator squad down into Steve's home objective quarter. His home objective was occupied by both a massive Lancer and a squad of Scouts. But terminators don't care 'bout that!
It was time for his home objective to be mine.
During the firing phase, my cultists took 5 more wounds which took them down below half strength. My terminators took a plasma cannon hit from the dreadnought.
And perhaps the most dire: my Land Raider received a super-accurate Lascannon blast from the Lancer in the middle of the board. It hit, TWICE, and ended up rolling 11 wounds. My Land Raider was not long for this world, and I needed to make plans for how to maximize its very limited time.
Points
Purge the Foe 4
Engage on All Fronts 2
Isaac's Turn 2
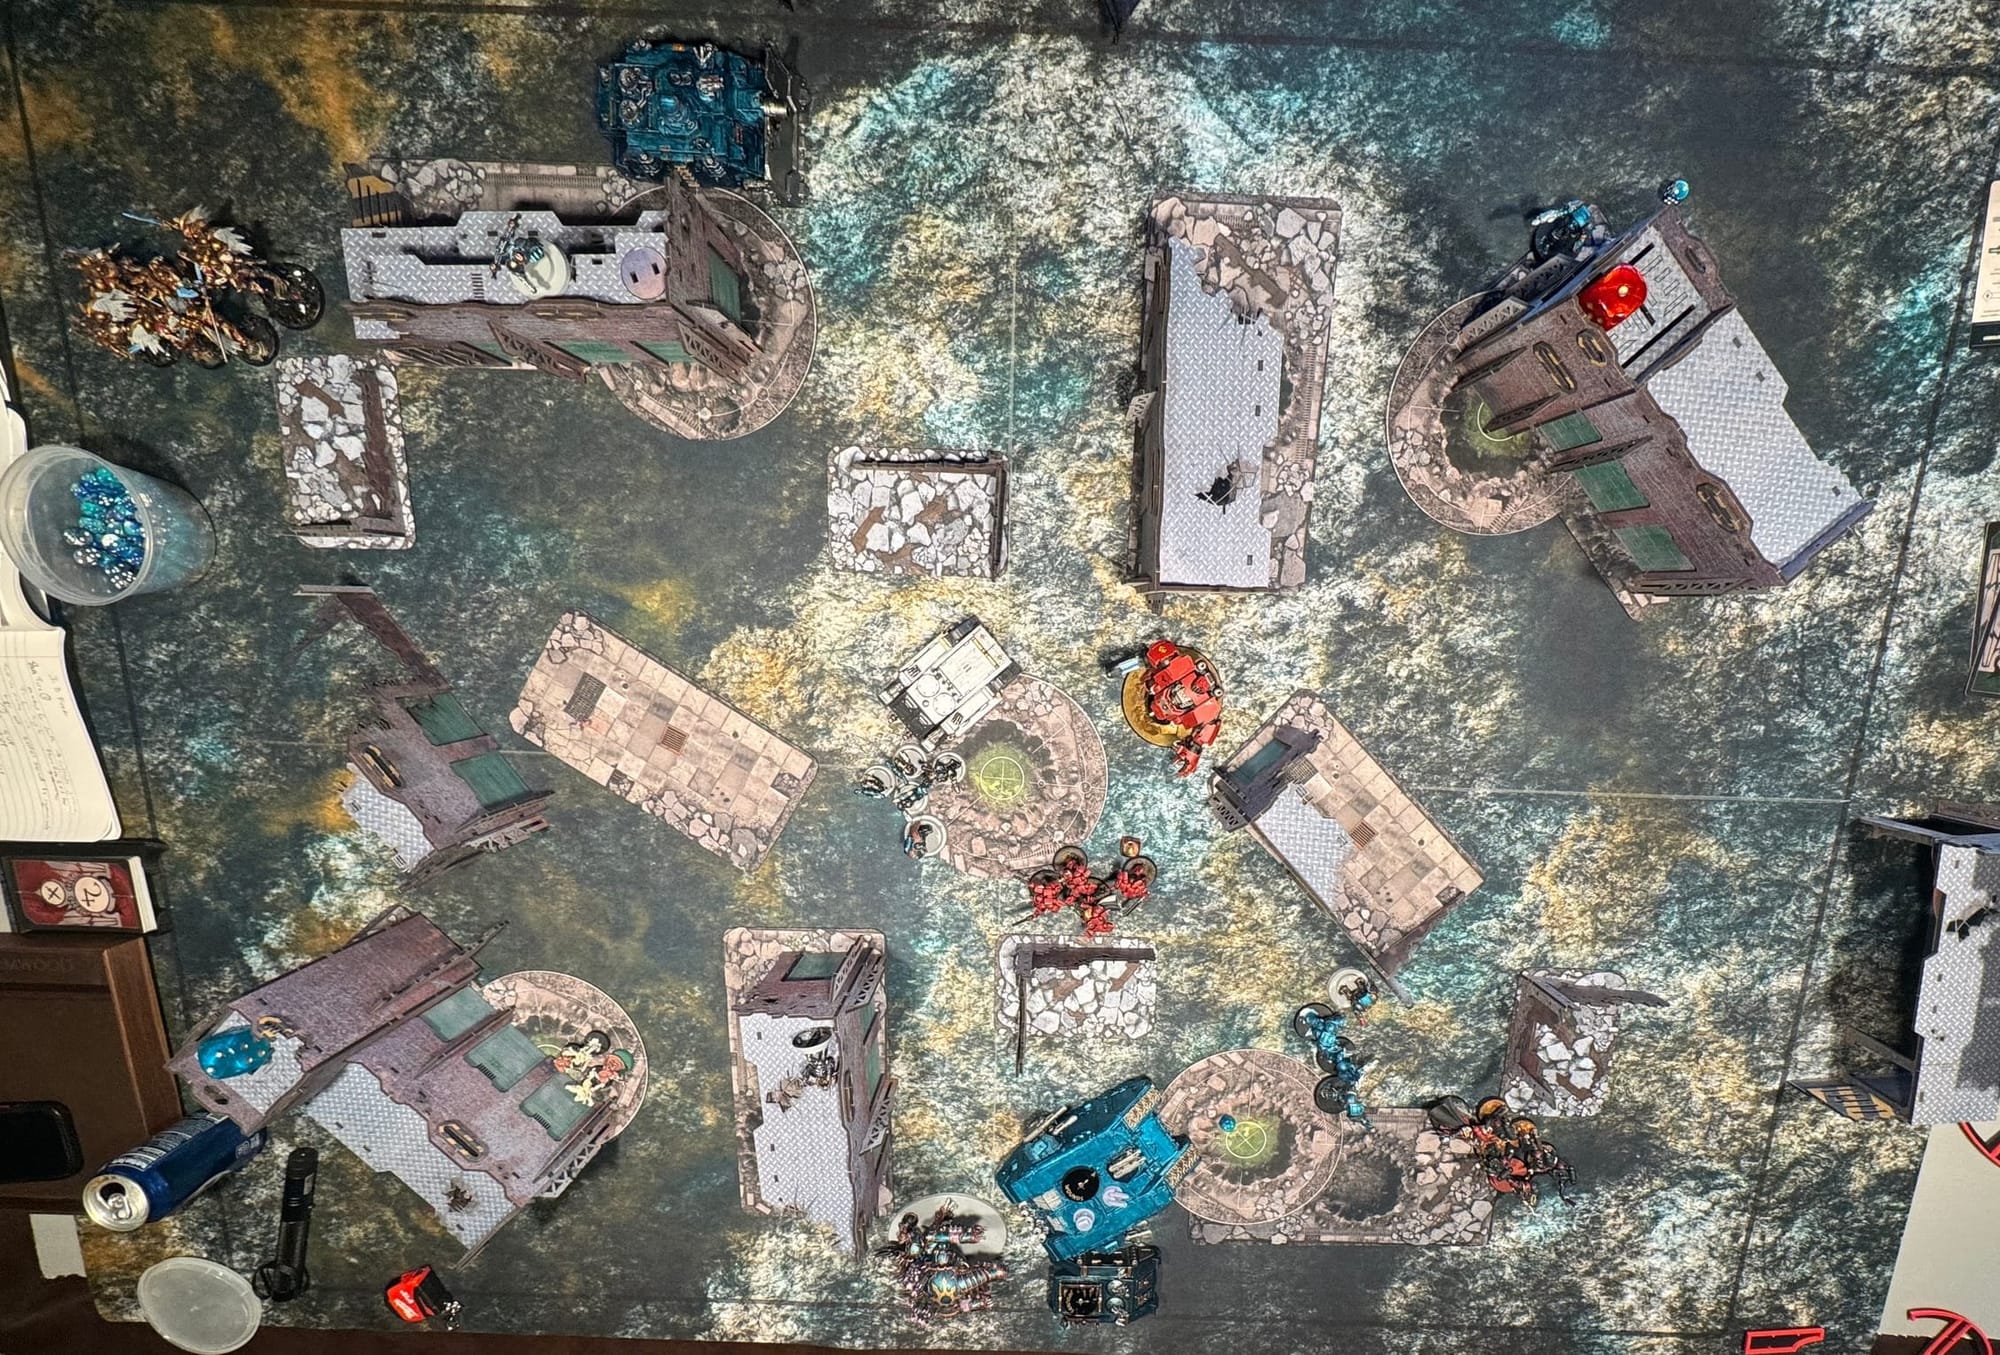
This would be the longest turn of the game by far. But a lot happened.
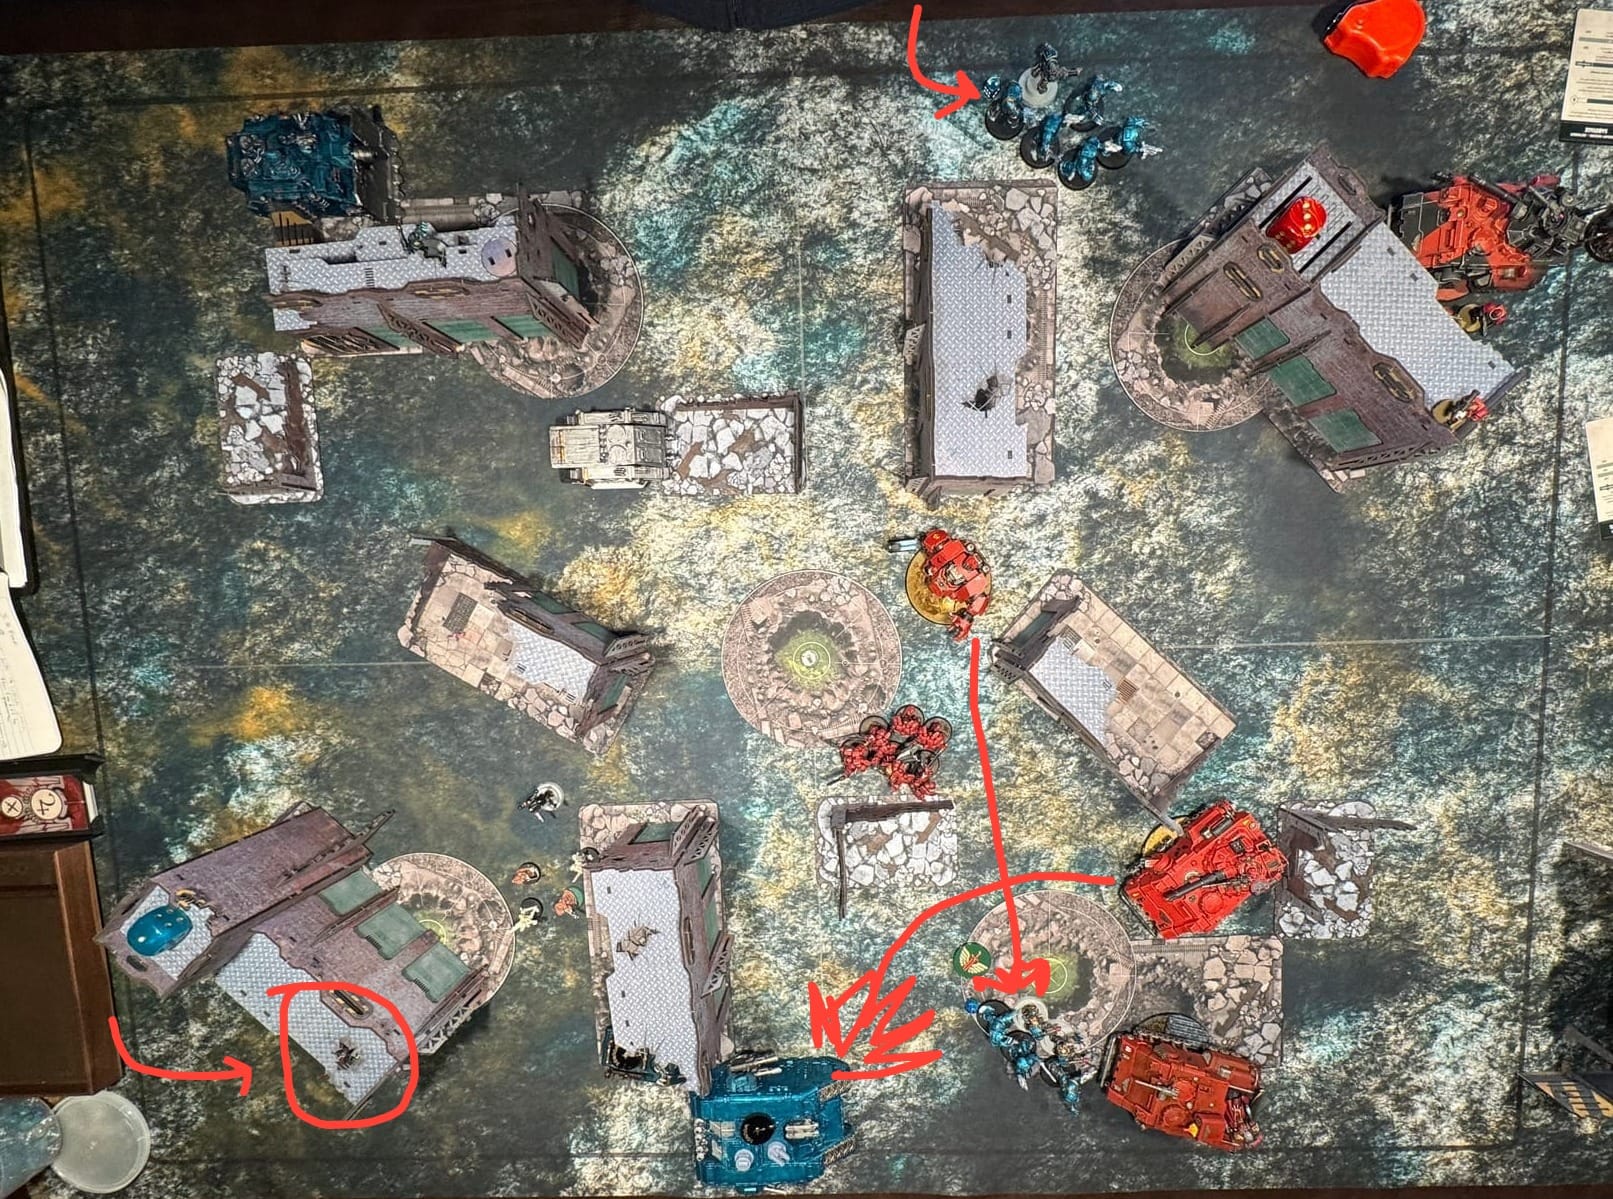
I rolled my Vindicator forward until it was finally ON the objective. This was the position I wanted it to be in during the first turn.
My cultists moved even closer to my home objective, close enough to realize a squad of hostiles (Death Company) were lurking inside. Not a good situation!
Looking at those Death Company marines, I felt the animal deep inside me demand that I attack and repel them. But NO. I had to stick to the plan. That objective wasn't my home any more. My home was out here, in No Man's Land. No Man's Land was now Man's Land. And that Man…was Isaac.
My two full Rhinos of Noise Marines ignored the Death Company behind them and drove engines blazing further into the middle of the board. One Rhino drove alongside my Land Raider with the plan of opening fire on the Impulsor. Another Rhino drove into the center objective and disembarked the Noise Marines inside, with the intention of opening fire on the Jump Pack Intercessors trying to take the objective.
And my Terminators at the top the board moved closer to both the Lancer and the Scouts.
My Forgefiend first tried to come out from reserves in Steve's backfield, but could find no spot where he could come out both on one of the sides (not the back) and not within 9" of enemy units. So instead he came out in the middle, behind my Land Raider, which actually turned out to be a pretty good spot.
At the end of my movement phase, Steve's Sanginor made himself known by plopping down into the Noise Marines, where he wiped them completely out. All by himself! Then he rapid ingressed his huge squad of Sanguinary Guard plus Dante around the corner of my Vindicator, with the obvious plan to destroy it.
But I wasn't going back! Only forward.
During shooting, I managed to shoot the Dreadnaught with my Vindicator and dealt 4 wounds.
My Chaos Lord felt he had to help the situation with the Sanginor, but first he tossed a grenade at the Jump Pack intercessors (and killed a couple).
The Forgefiend opened fire at the Impulsor and it died! Boom!
The Land Raider opened fire at the Lancer and did a huge number of wounds, but it somehow survived with a few wounds left!
The Terminators at the top opened fire on the Scouts and killed every one of them under massed combi-weapon fire.
Then in the charging phase the Terminators charged the Lancer, the Chaos Lord plus Legionnaires charged the Sanginor, and the Terminators at the bottom charged the mostly-dead Lancer.
The Chaos Lord killed the Sanginor. The Terminators at the bottom finished off that Lancer. And the Terminators at the top fully killed THAT Lancer.
I had defeated all of Steve's tanks in a single turn.
Points
Sabotage 2
Steve's Turn Three
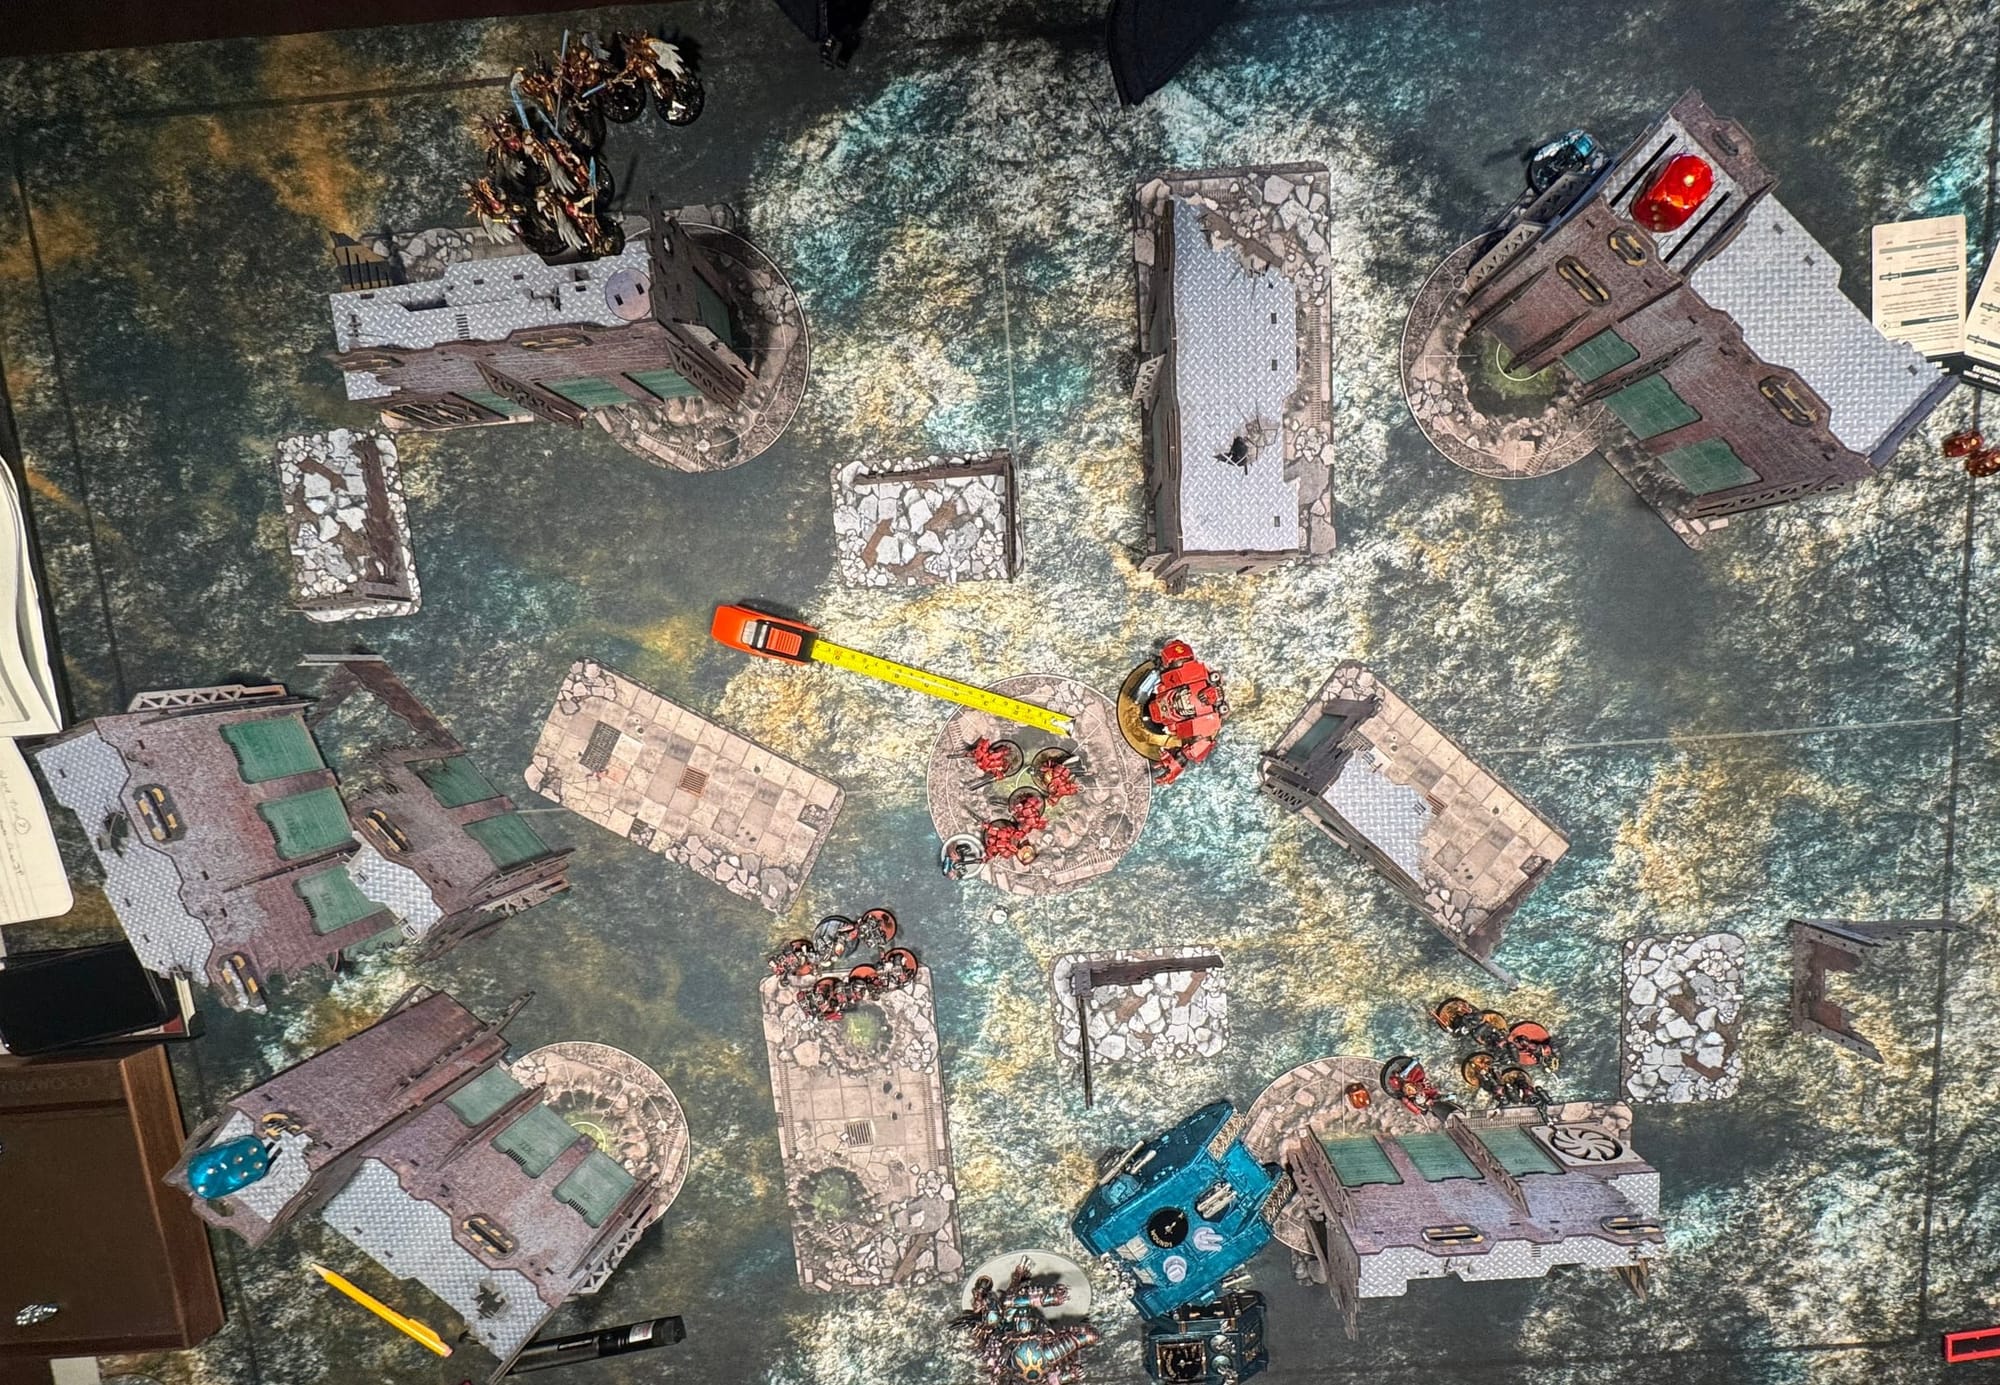
The Sanguinary Guard plus Dante came around the corner and first targeted my Chaos Lord on Jump Pack with a grenade, and then opened fire on him with their pistols, which finished him off.
The Jump Pack Intercessors (who also had the Captain) jumped into attacking range of my Chaos Lord's unit.
Mephiston and the Death Company squad without jump packs moved into attacking range of my Terminators.
The Death Company squad WITH jump packs left my former home objective and jumped into a staging area where they would have easy access to both the center objective, as well as whatever mess emerged from the fighting happening on his natural objective.
Everyone charged who could charge.
Dante and the Sanguinary Guard wiped out my Vindicator.
The Captain plus Intercessors killed all my Legionnaires, but left my Chaos Lord with a single wound.
Mephiston and the Death Company wiped out my Terminators.
Points
Purge the Foe 4
Isaac Turn 3
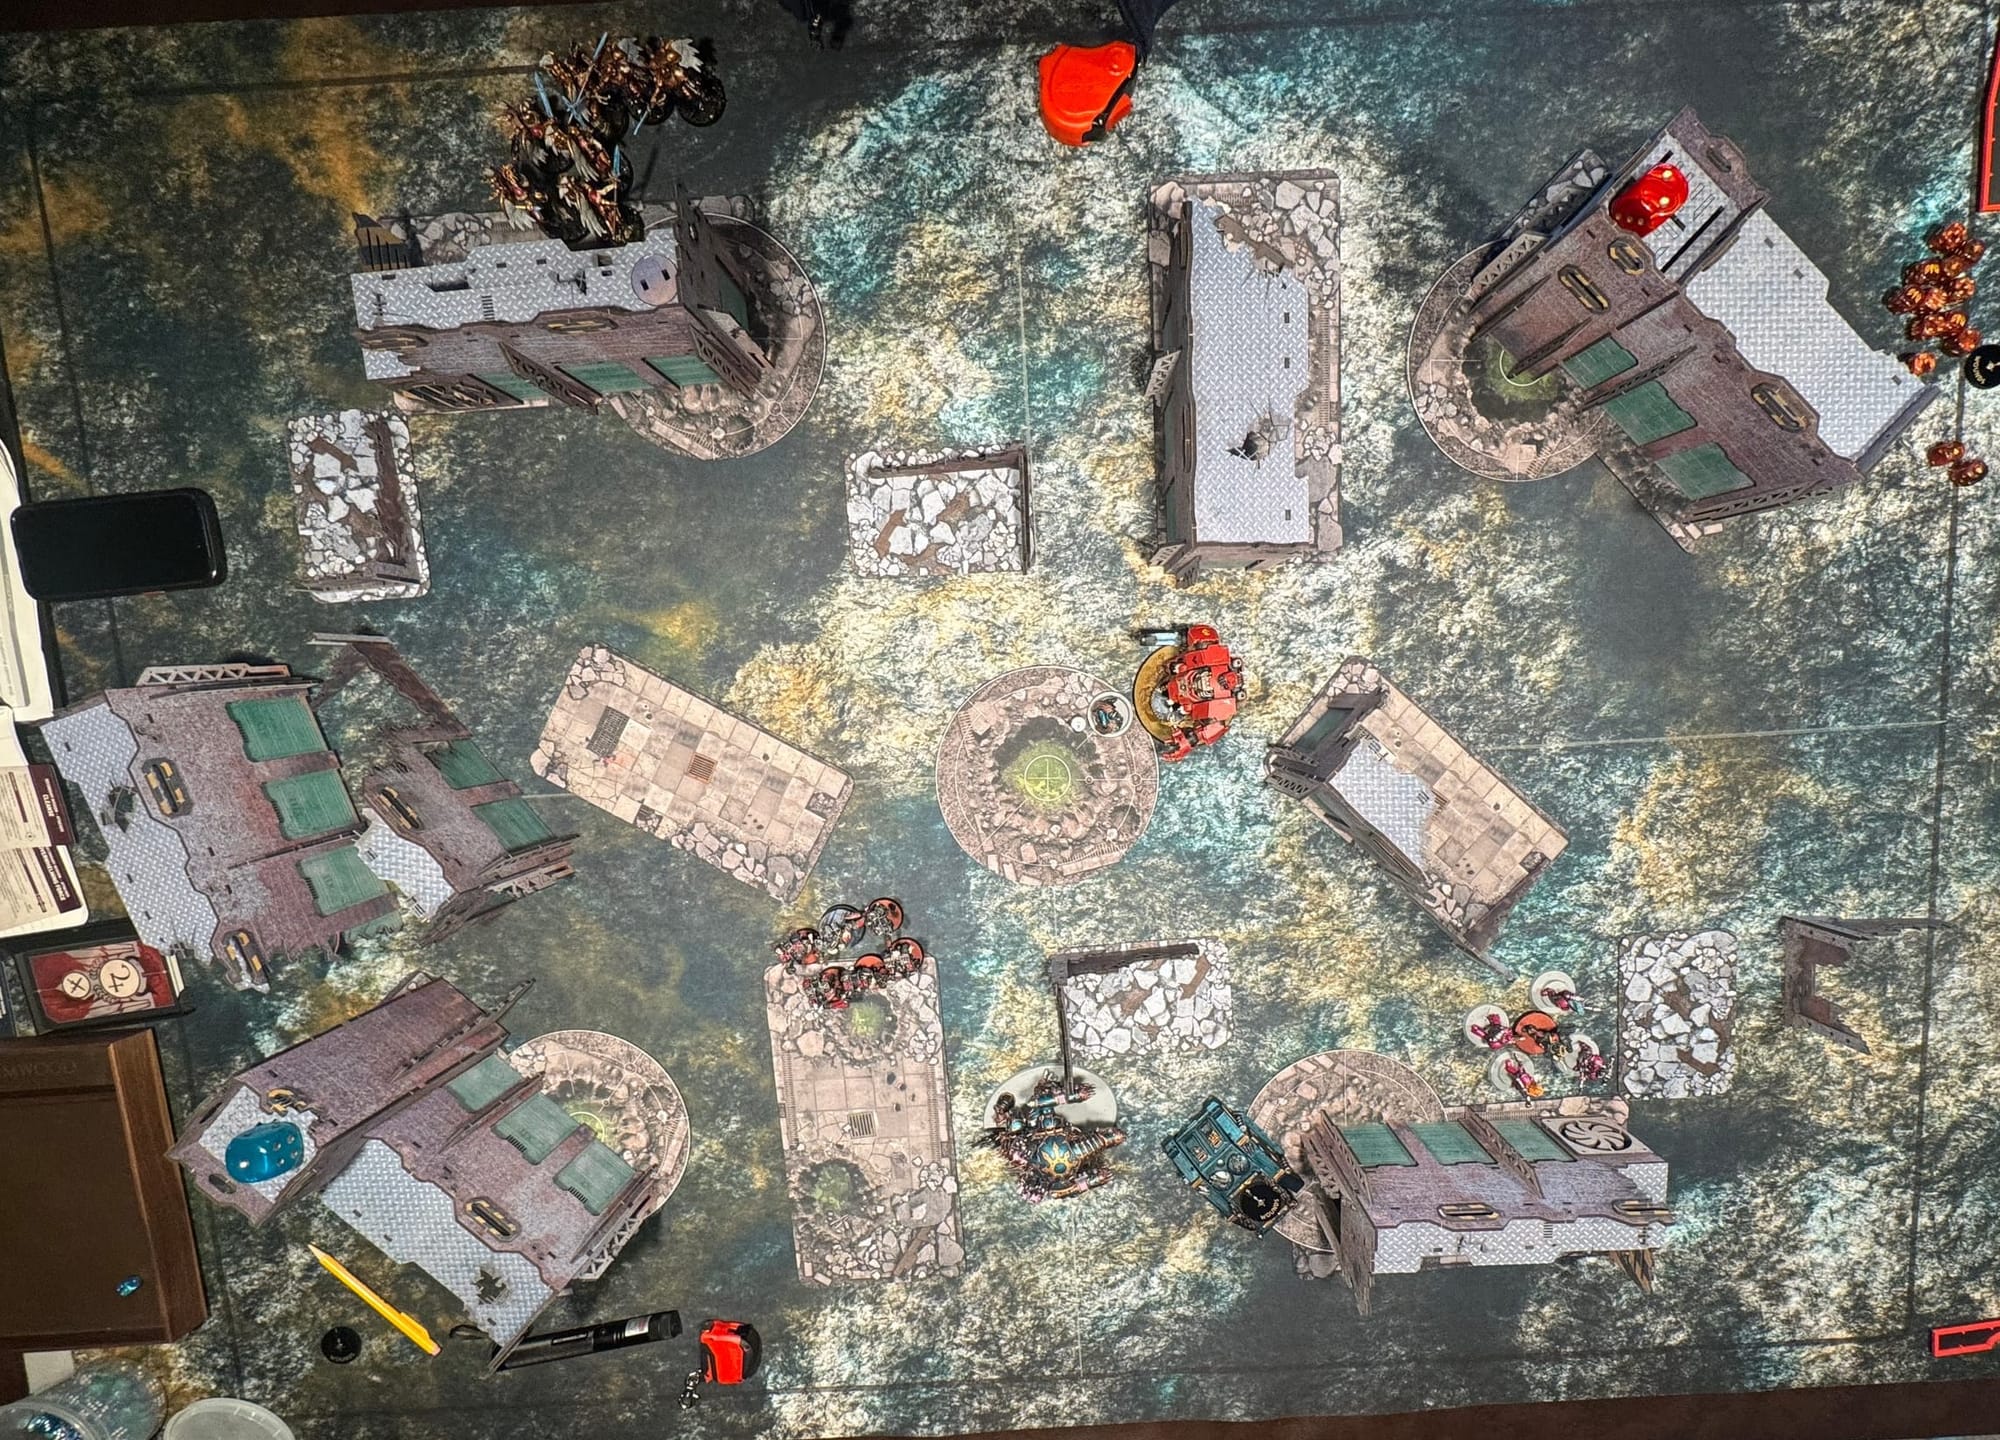
My Forgefiend moved into position to fire on Mephiston and the Death Company on foot.
My Land Raider moved into position to fire on the Dreadnaught.
My Noise Marines disembarked and moved into position to fire on Mephiston and the Death Company.
During shooting, I managed to take the Dreadnaught down to 2 wounds left. I killed Mephiston. And I almost killed all the Death Company, only the Death Company Captain remained.
I charged my Land Raider into both the Captain and the Dreadnaught (can I charge two things? In retrospect maybe I couldn't do that). I used the Tank Shock stratagem and successfully ran over the Captain. But the Dreadnaught then killed my Land Raider in combat and only my Chaos Lord remained.
Getting frustrated with the Death Company Captain, I charged him with my Noise Marines. I figured at least he wouldn't get his charging bonus. The Noise Marines had him completely surrounded, but as expected did minimal damage. In response, he killed 4 of the Noise Marines.
Points
Purge the Foe 8
Assassination 5
Steve's Turn 4
This game was brutal! We were running out of dudes.
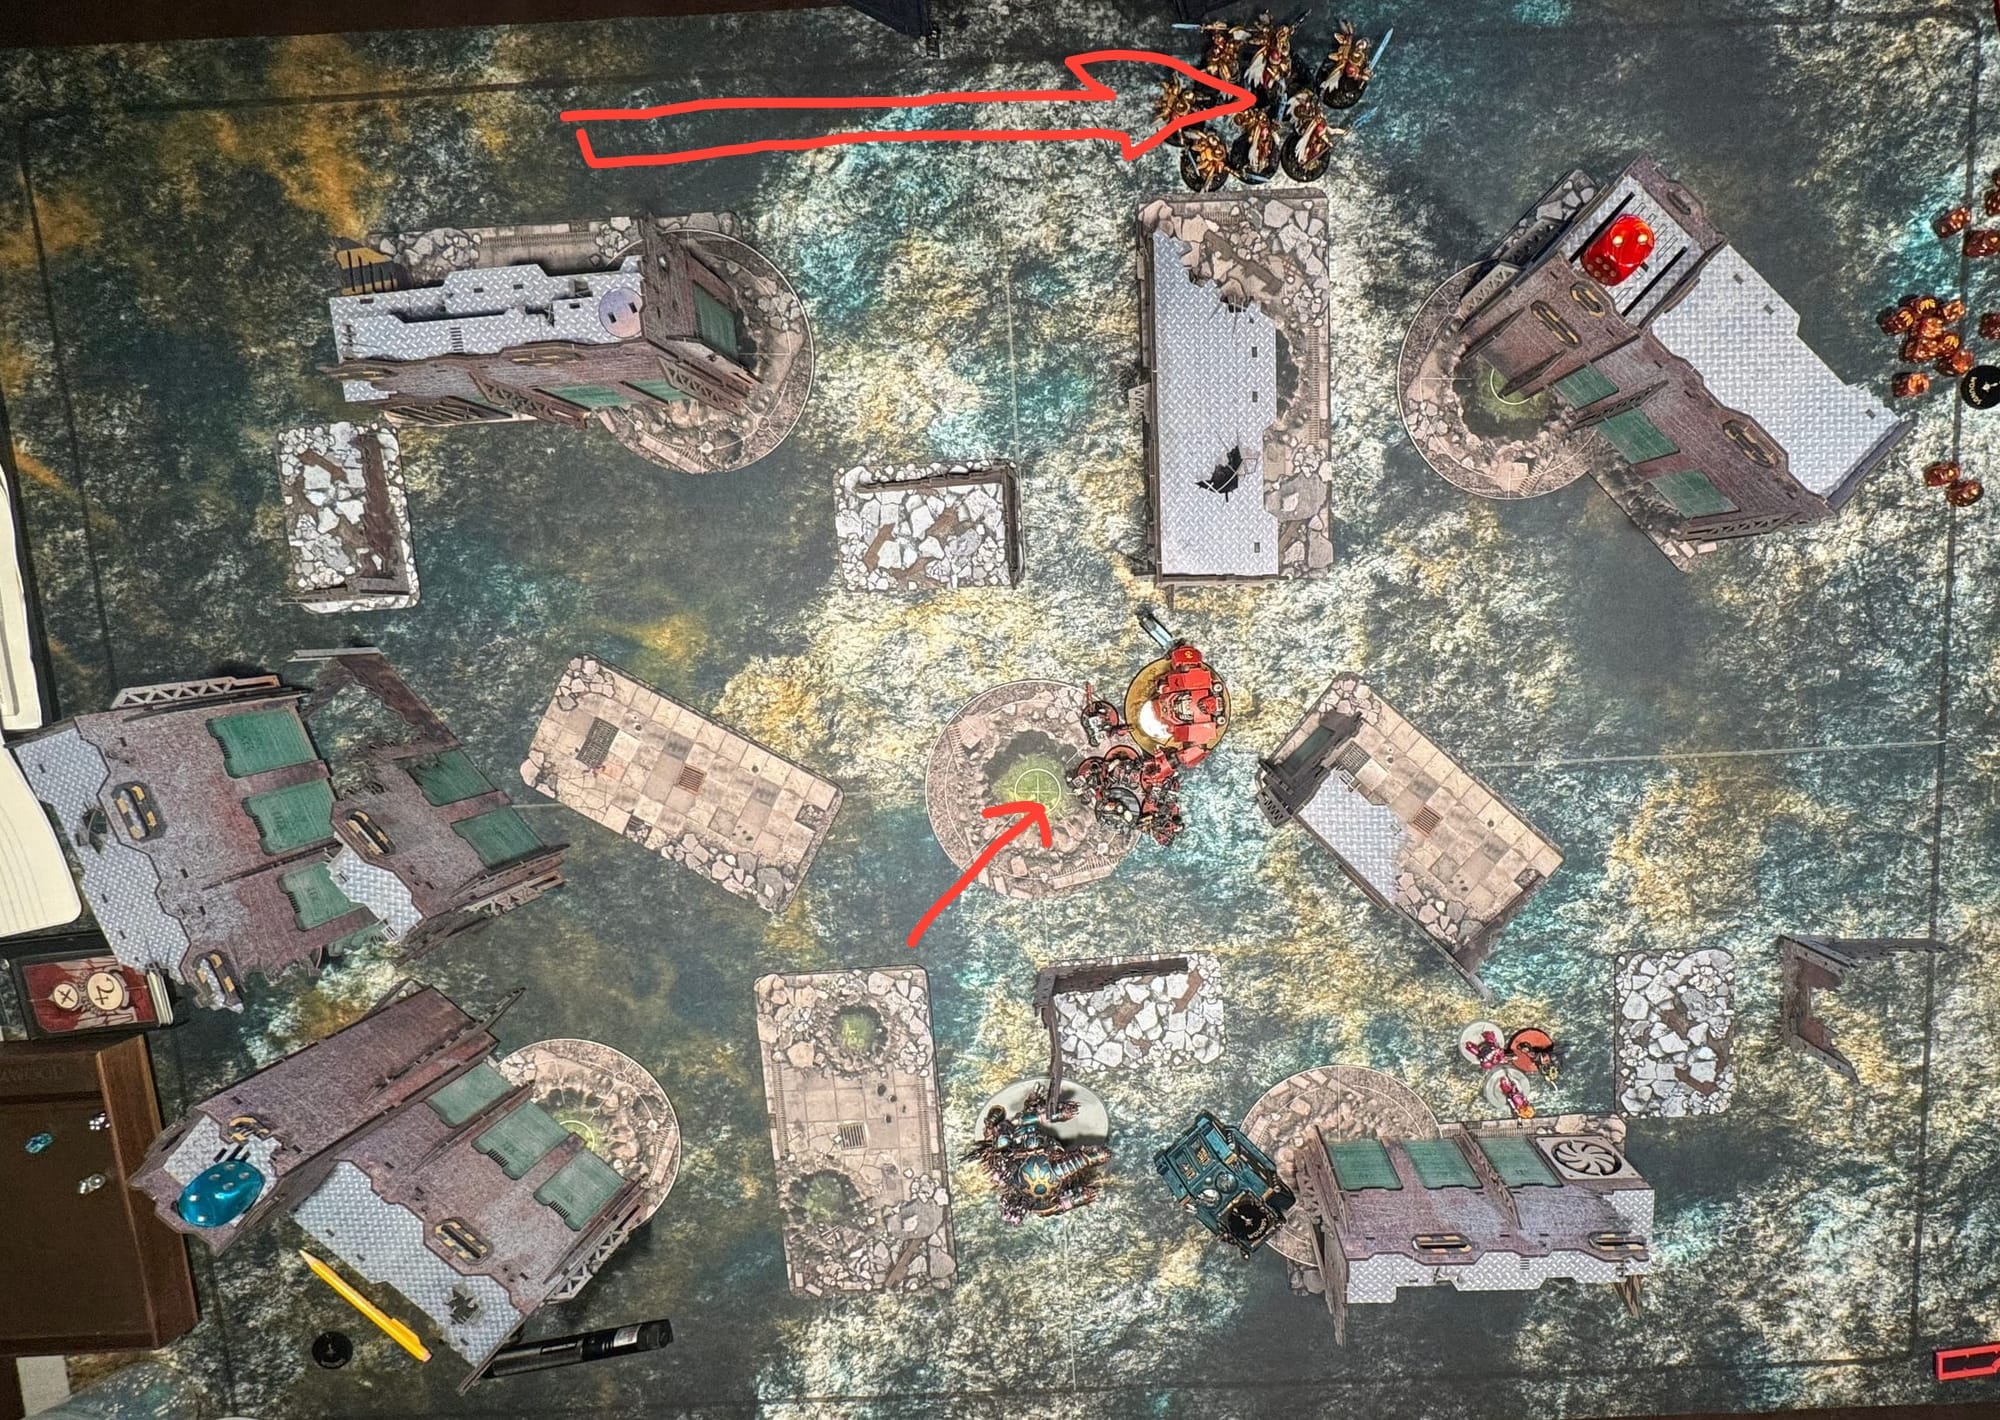
The Death Company with Jump Packs (with Lemartes) decided they need to help hold the center objective and charged my Chaos Lord with his one wound left.
Dante plus the Sanguinary Guard decided to try to cross the entire board to attack my Terminators, and they got surprisingly close! They rolled a six for advancing and got about 8" away. If they had sucessfully charged my Terminators, it probably would have been all over.
But the dice gods looked away from the Sanguinary Guard this time. They rolled a 4 to charge, and then re-rolled to roll another 4.
Mediocre!
Points
Purge the Foe 4
Sabotage 6
No Prisoners 5
Isaac's Turn 4
I used the Stratagem Coils of Deception to allow my noise marines to fall back and shoot at the Death Company Captain.
My Terminators moved into range of the Sanguinary Guard.
My Forgefiend moved into position to fire on the Dreadnaught.
During shooting I killed the Dreadnaught. I killed MOST of the Sanguinary Guard. I did NOT kill the Death Company Captain.
During the fighting phase I killed the remaining Sanguinary Guard, leaving only Dante.
Points
Purge the Foe 8
Cleanse 5
Overwhelming Force 5
Behind Enemy Lines 3
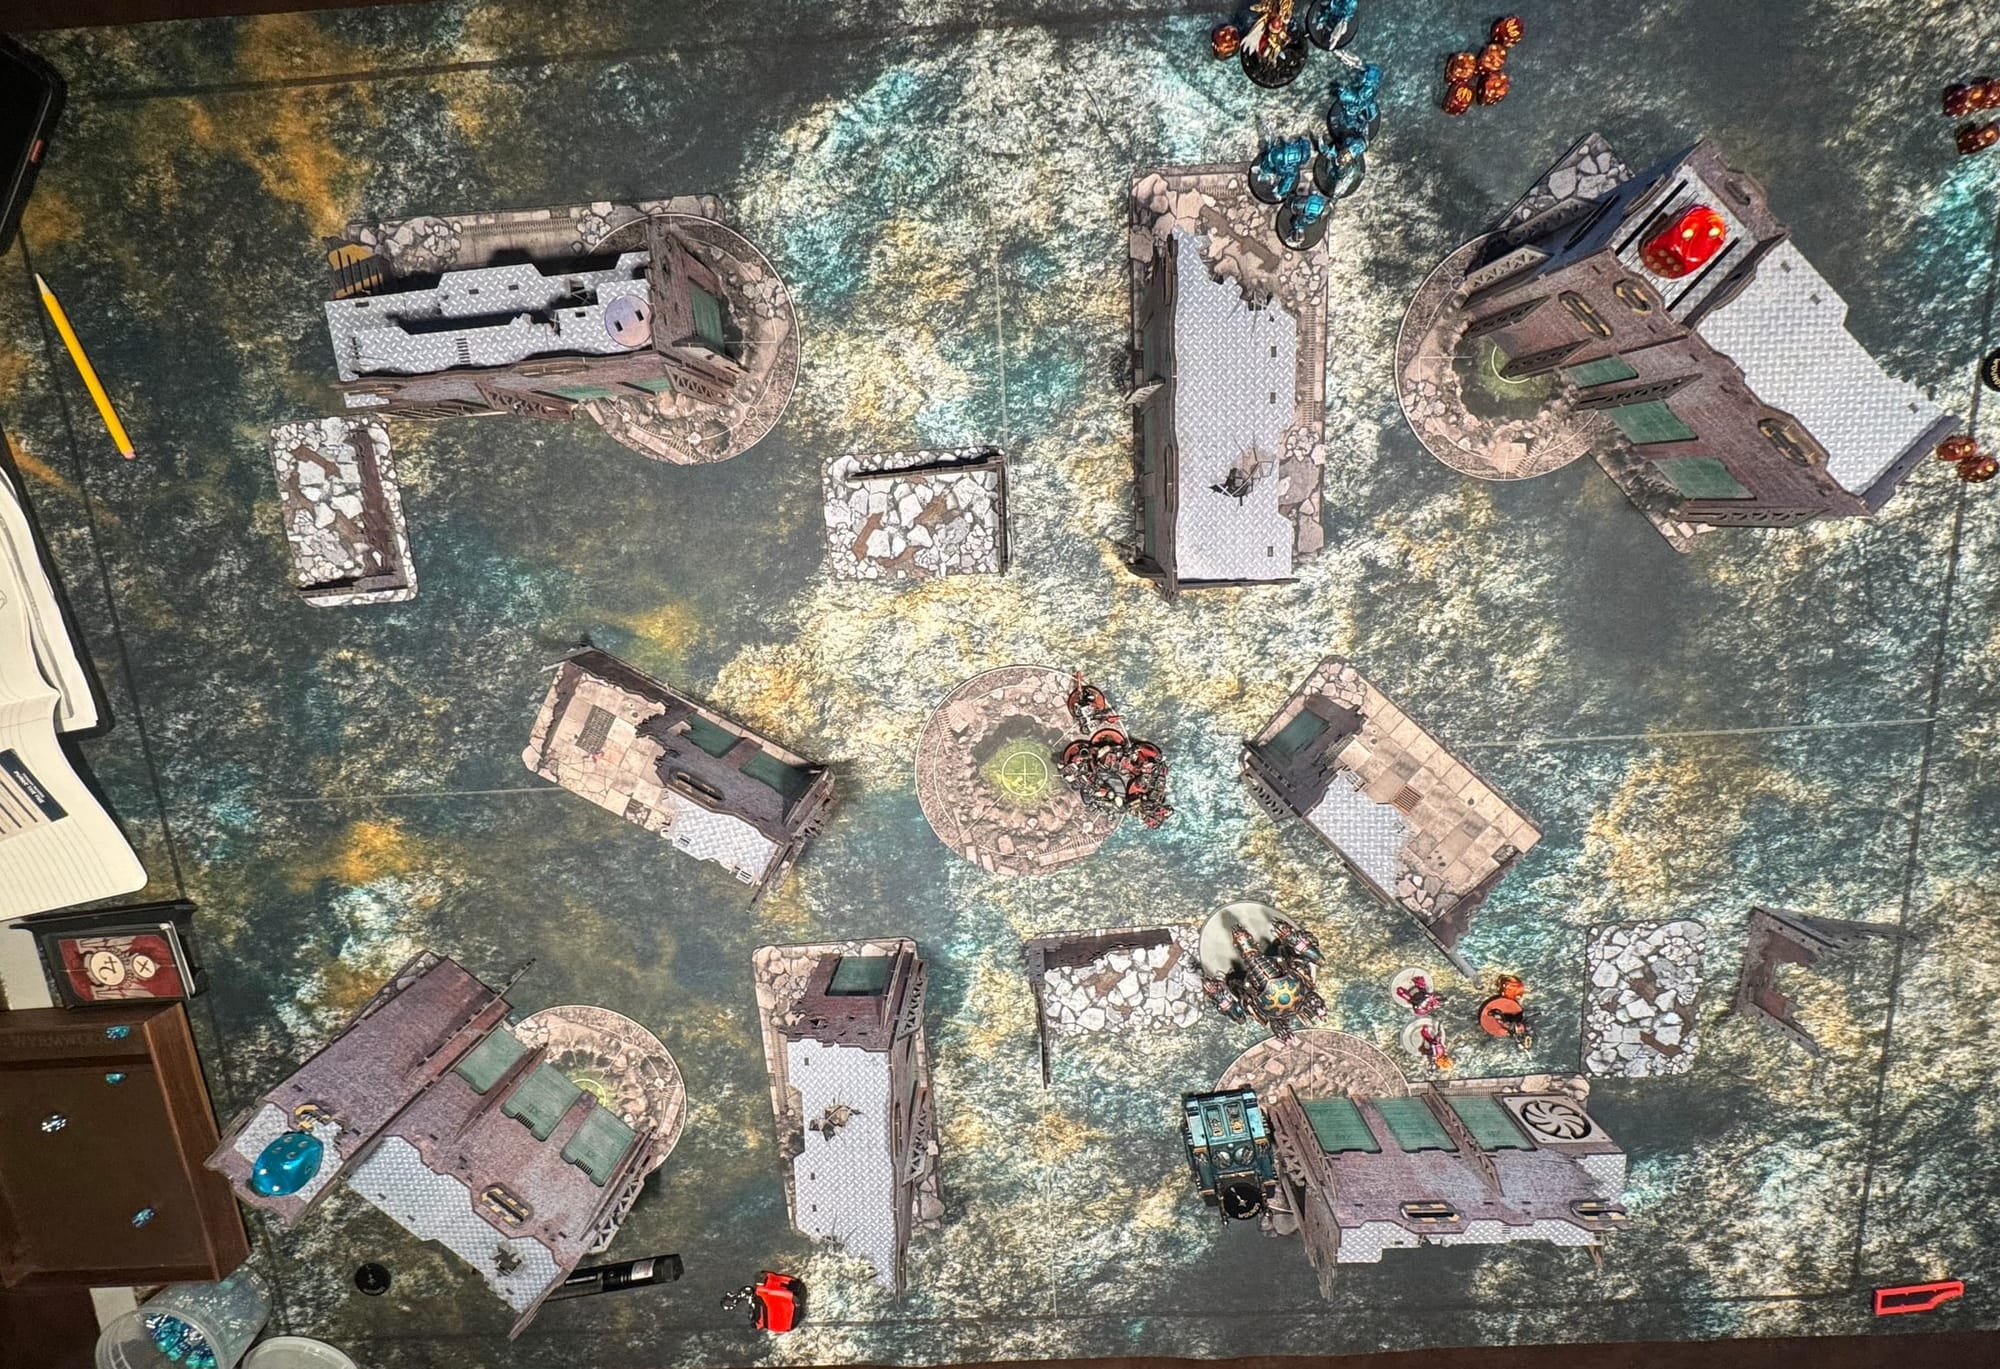
The Remaining Fifth Round
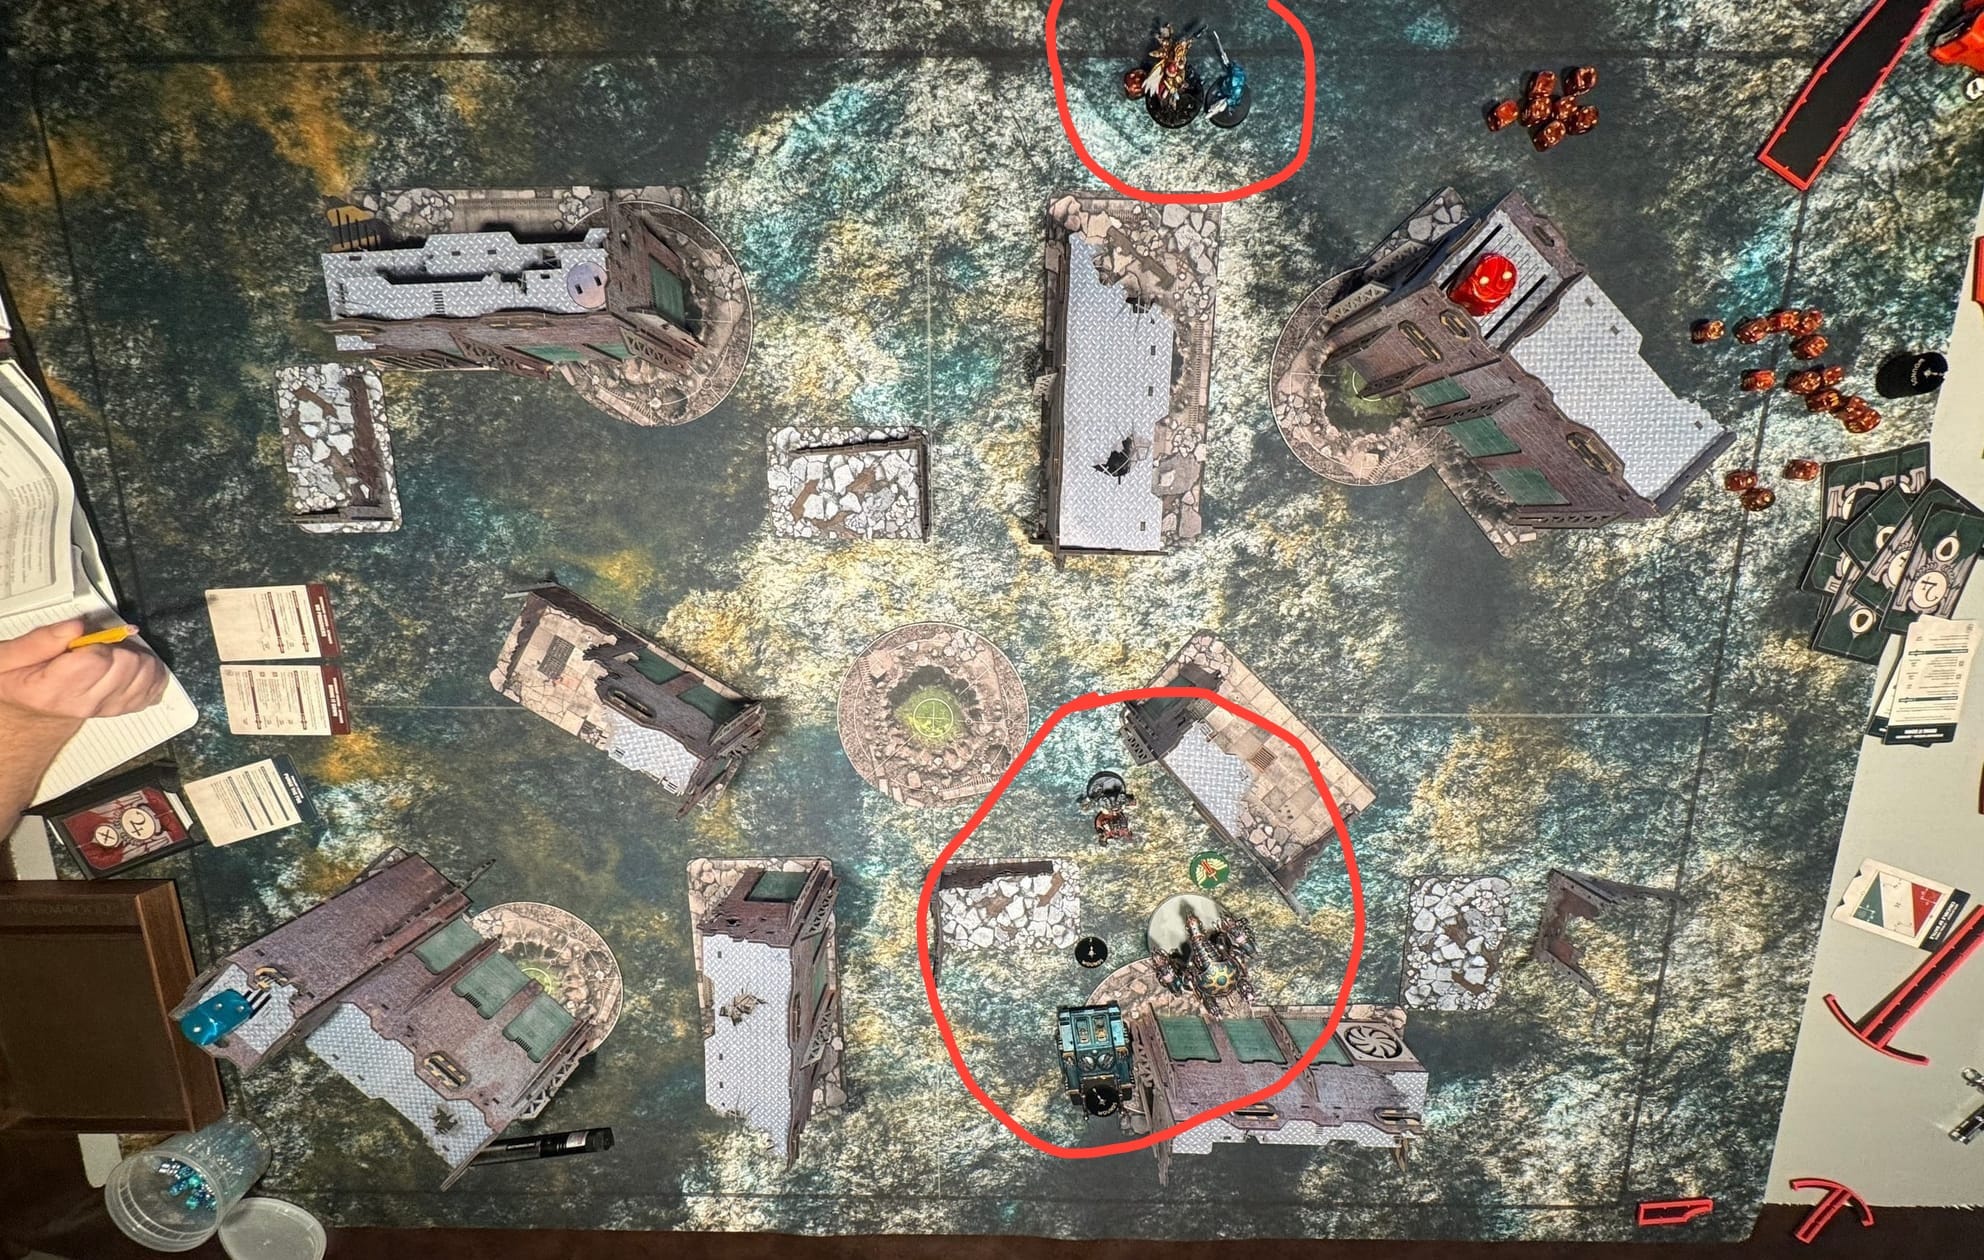
We determined Steve had no more units to hold anything, except for his Death Company. Maybe if he killed all my Terminators with Dante. Maybe if he killed my Forgefiend.
We quickly rolled all the dice for this last battle round and nothing substantially changed. Dante was still alive and facing my Sorcerer. The Death Company failed to kill my Forgefiend.
The Death Company Captain finished off my noise marines, but then was taken down by the Forgefiend (who did a tank shock butt-first to finish him off with his lobster tail, not normally a weapon).
Final Score:
Steve Vs. Isaac
41-56
End Game Analysis
The end score was pretty close.
The only thing I'm 100% positive I did right was continuing to move into the middle of the board instead of responding to Steve's deep strikes into my starting deployment zone.
It felt very, very bad at first. But it started to feel better when I realized his jump pack units were worth a lot of points, and the models they were wiping out (some cultists and a single Vindicator tank) were small fractions of the point costs of the units doing the killing.
Instead, I focused on his armor. And after his armor was down I focused in his infantry in the middle of the board and back at his home objective.
There will come a time when I'm going to have to figure out how to hold my home objective. The mission Linchpin practically requires it. But that day wouldn't be today.
Not a lot of Steve's army were setup to handle terminators, and I showed up today with 2 squads of 5. With each squad led by a chaos sorcerer!
Finally, a big mistake was having my noise marines get out of their tank voluntarily. The Sanguinor was lurking up in the sky just waiting for them to get out. In the future I'm going to let the Sanguinor tear open the tank first before he gets access to the juicy marines inside.
Even more finally, in a bit of meta commentary, I feel like the blog is slowly improving. Still haven't quite figured out a regular publishing schedule, yet. This battle report's spent about a month in my drafts folder, I think because I couldn't find a feature image. Well forget that! The only direction the quality of this blog can possibly go is up.